Install and configure an IBM i client in a Commvault Software environment

One thing that has been surprising working with Commvault over the years is the data protection software's extensive support of different cloud vendors, hypervisors, storage and operating systems. An operating system and hardware platform that I was quite surprised to work with again was the IBM Power platform running the IBM i operating system.
Commvault does not just support IBM i file system backups but can actually perform full system backups and bare metal restores of an IBM i Power LPAR.
This Commvault feature can help customers looking to comply with their Essential 8 Maturity Level 1 Regular Backups Requirement.
"Backups of data, applications and settings are synchronised to enable restoration to a common point in time."
This means applications that are running in different technology stacks and operating systems including IBM i, AIX and Linux in the IBM Power platform can run backups and have restorations to that same point in time as their Windows, Linux, hypervisor based virtual machines, databases, kubernetes clusters, Microsoft 365... and the list goes on.
To learn more please visit, https://documentation.commvault.com/
One other benefit of this Commvault feature is also helping customers to move away from platform specific point solutions that require legacy complex skillsets to manage and maintain.
Commvault also makes the IBM i backup more portable as the backup data can be directed to write to an external storage hosted on another data center or cloud storage. It is a perfect solution for companies looking at air-gap and cleanroom solutions for their IBM i.
On this post, I am going to cover the steps of how to install and configure the Commvault software to an IBM i server client. The whole environment is built and run on the IBM Cloud. This is was the only cloud vendors able to run the combinations of operating systems I needed for my test.
A big thanks to Daryn Higgins from TD Synnex for providing access and networking help to the IBM Cloud.
I also want to thank John Fearon from Oncall Group with proving IBMi expertise to get my basic IBM i administration knowledge over the line to complete this build.
Prerequisites and references
- An IBM Cloud Account, https://cloud.ibm.com/login
- Commvault Server running on Windows,
https://connectedtech.com.au/provision-a-windows-server-on-the-ibm-cloud-in-less-than-10-minutes/
https://connectedtech.com.au/setting-up-remote-rdp-connection-to-an-ibm-cloud-windows-instance/
https://backupthecloud.info/commserve-install/ - A Linux Server installed and configured as a Commvault MediaAgent,
https://connectedtech.com.au/provision-a-linux-server-on-the-ibm-cloud-in-less-than-10-minutes/
https://backupthecloud.info/install-linux-commvault-media-agent/ - An IBM i Power instance,
https://connectedtech.com.au/provision-ibmi-on-ibm-cloud-in-less-than-30-minutes/
https://connectedtech.com.au/create-a-new-user-account-on-an-ibmi-server/ - Network connectivity between the IBM Cloud VPC compute and the Power virtual instances
https://connectedtech.com.au/connect-your-ibmi-instance-to-your-vpc-resources/
Tip - Make sure to power down or delete instances when not in use. These are cloud resources that are charged by the hour.
Before we begin, if you found this post useful please consider clicking the Subscribe button to ask questions or provide comments.
Let's get to it.
Step 1
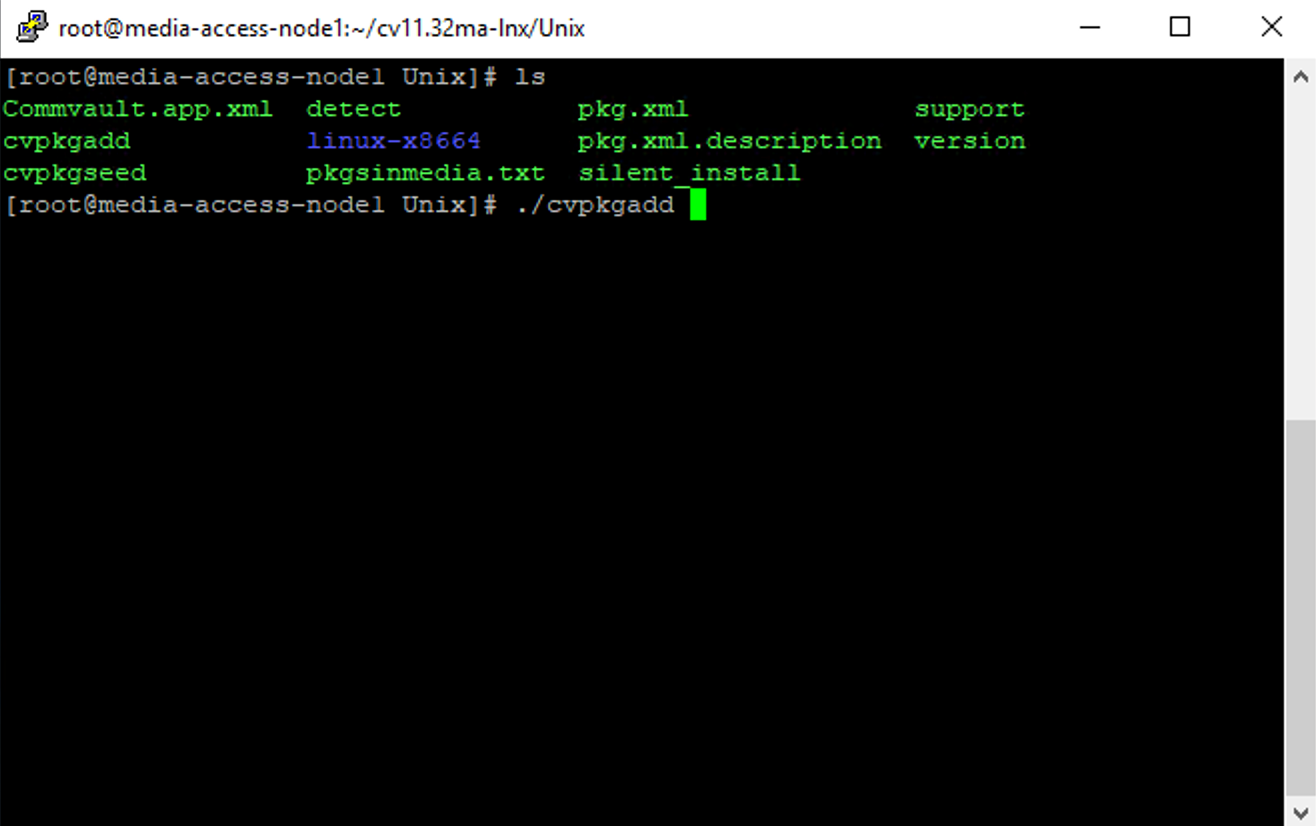
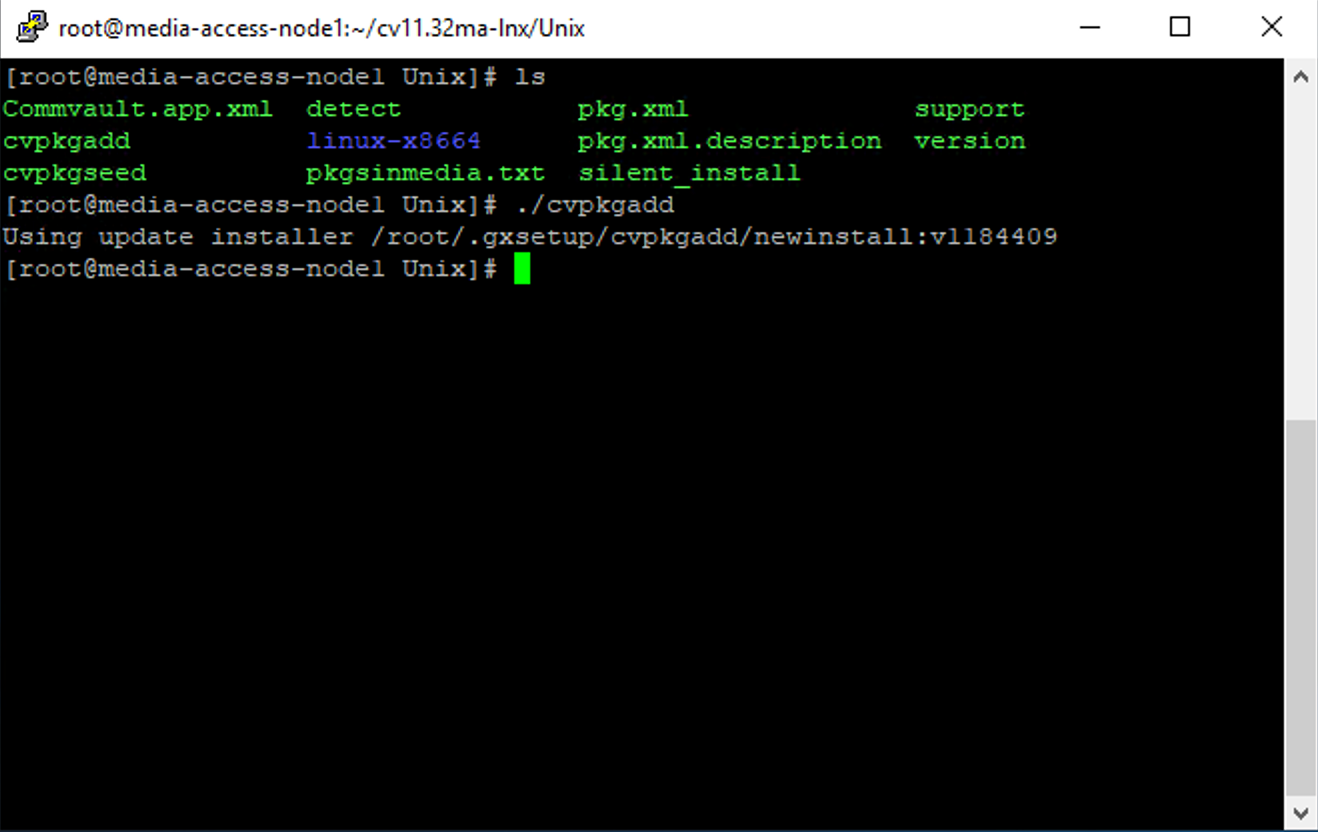
On the Linux MediaAgent server, install the IBM i File System agent.
On the command line, run the package installer cvpkgadd.
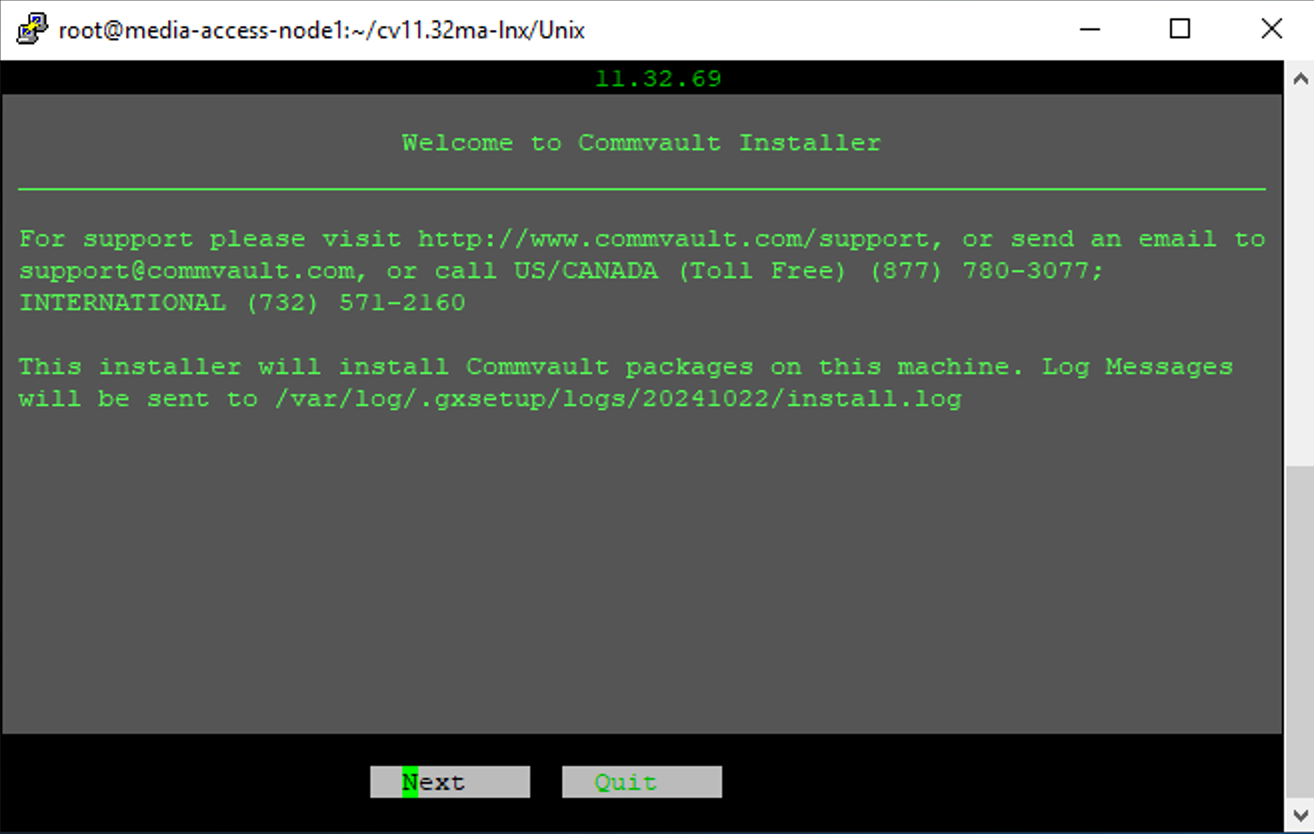
Step 2
Click Next on the Welcome screen.
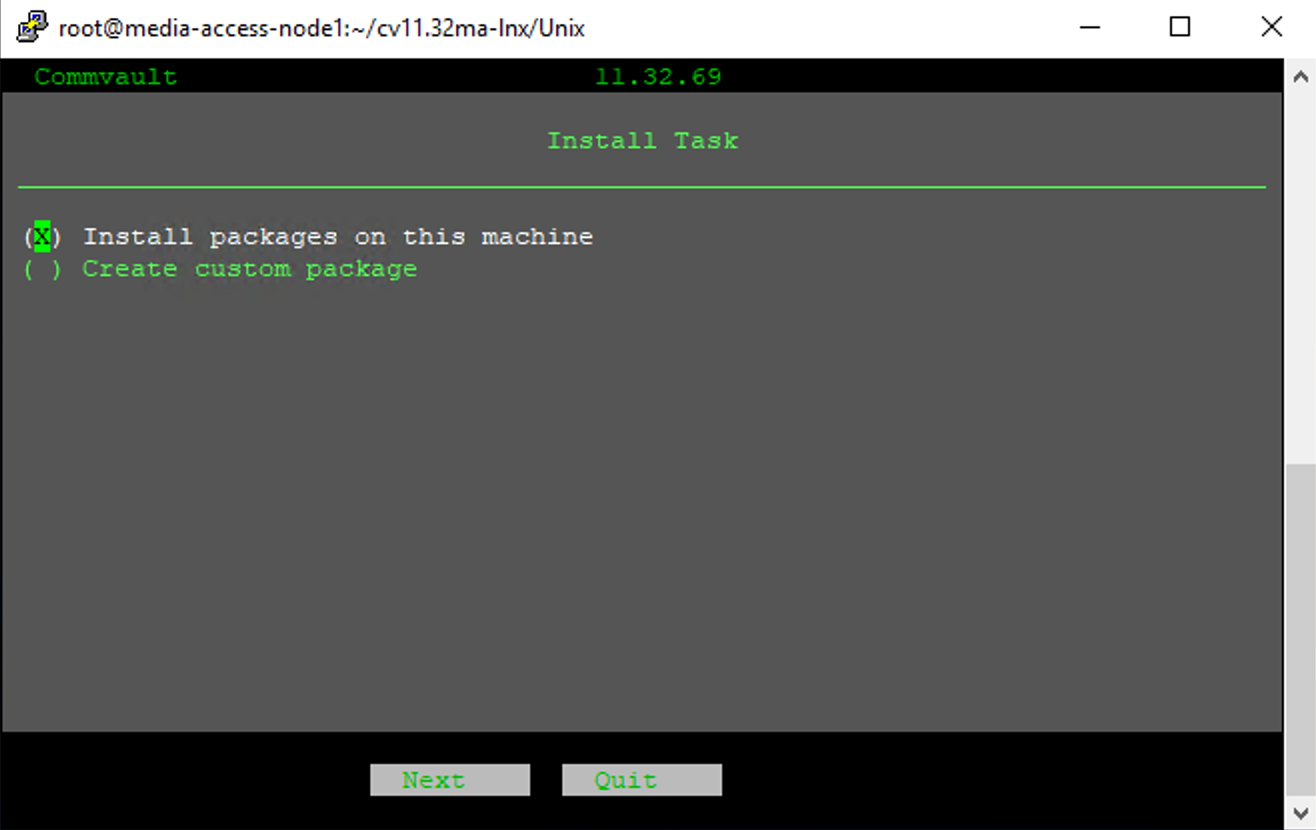
Step 3
Click Next to install packages on this machine.
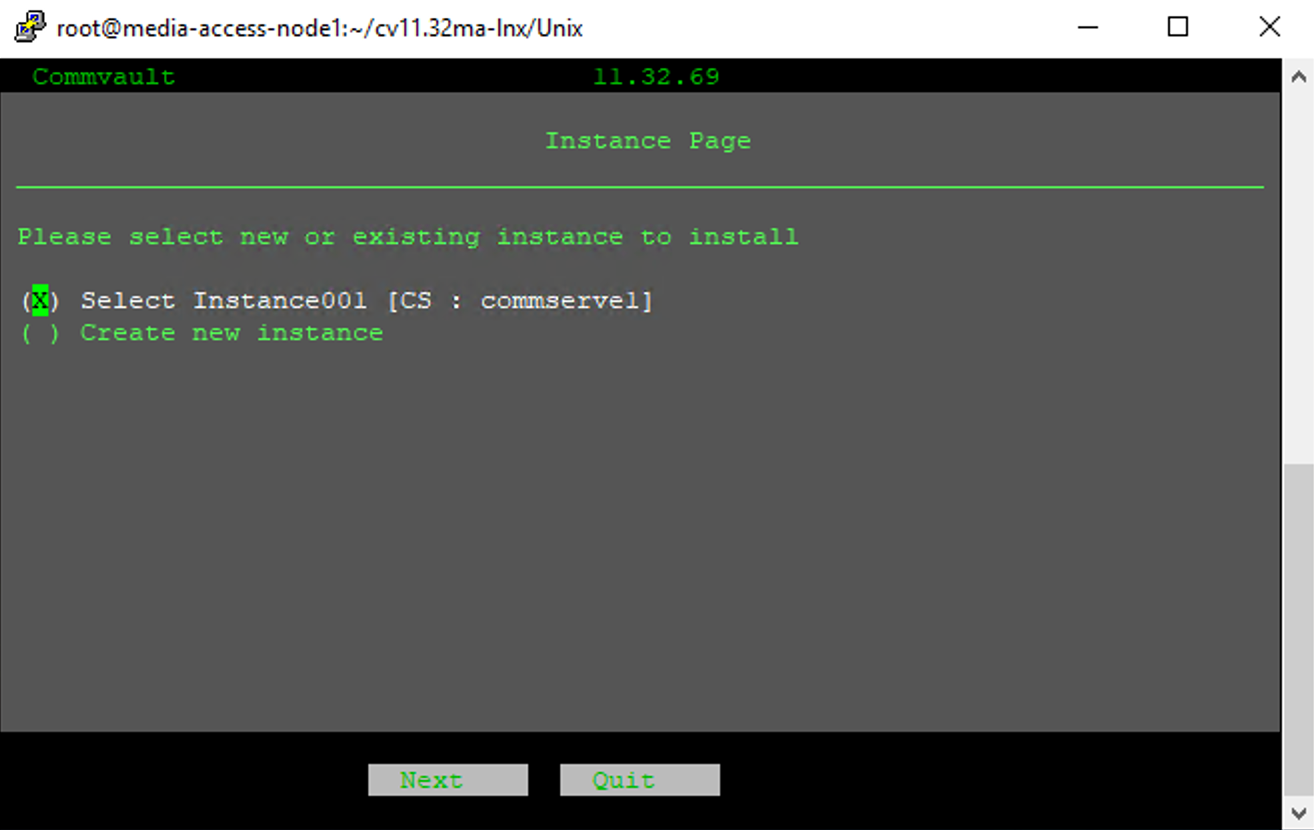
Step 4
Select the existing Instance. Click Next.
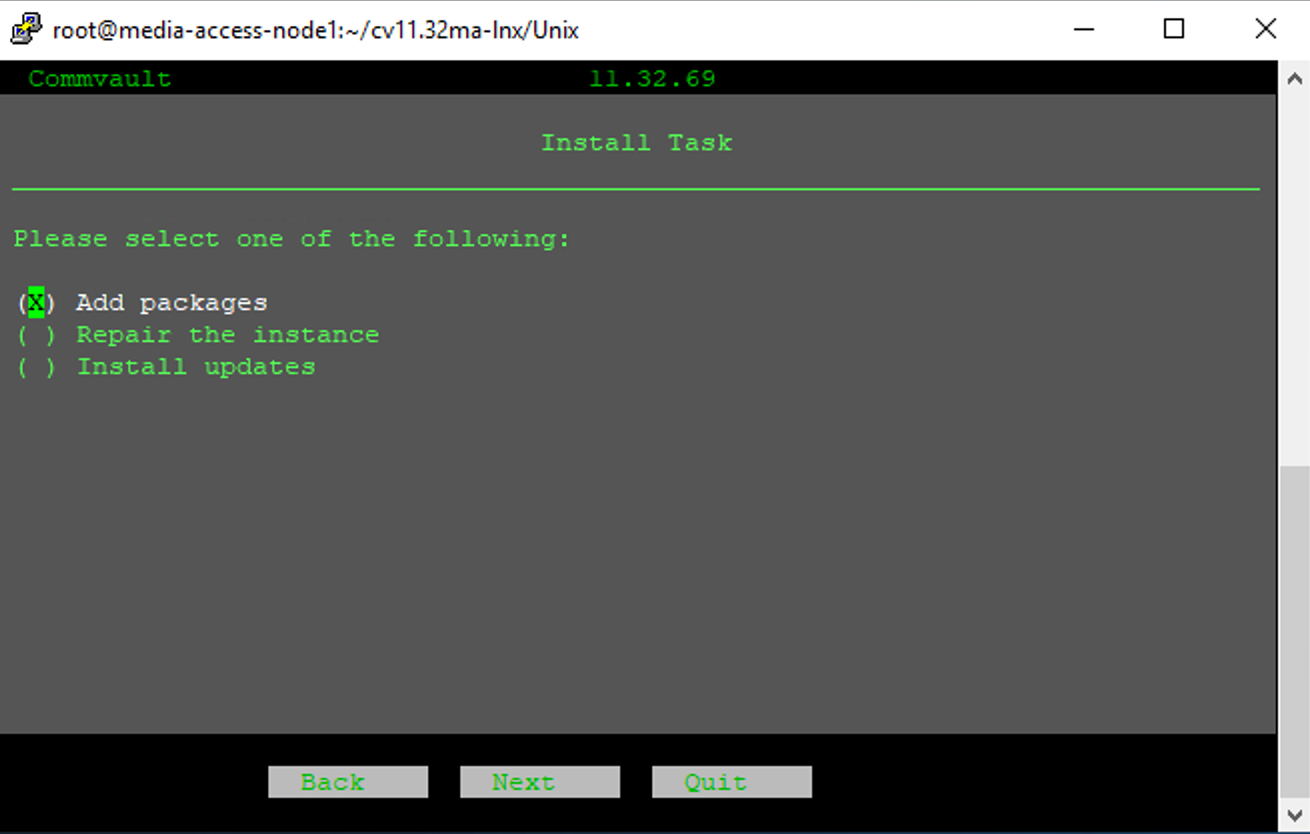
Step 5
Select install Add packages. Click Next.
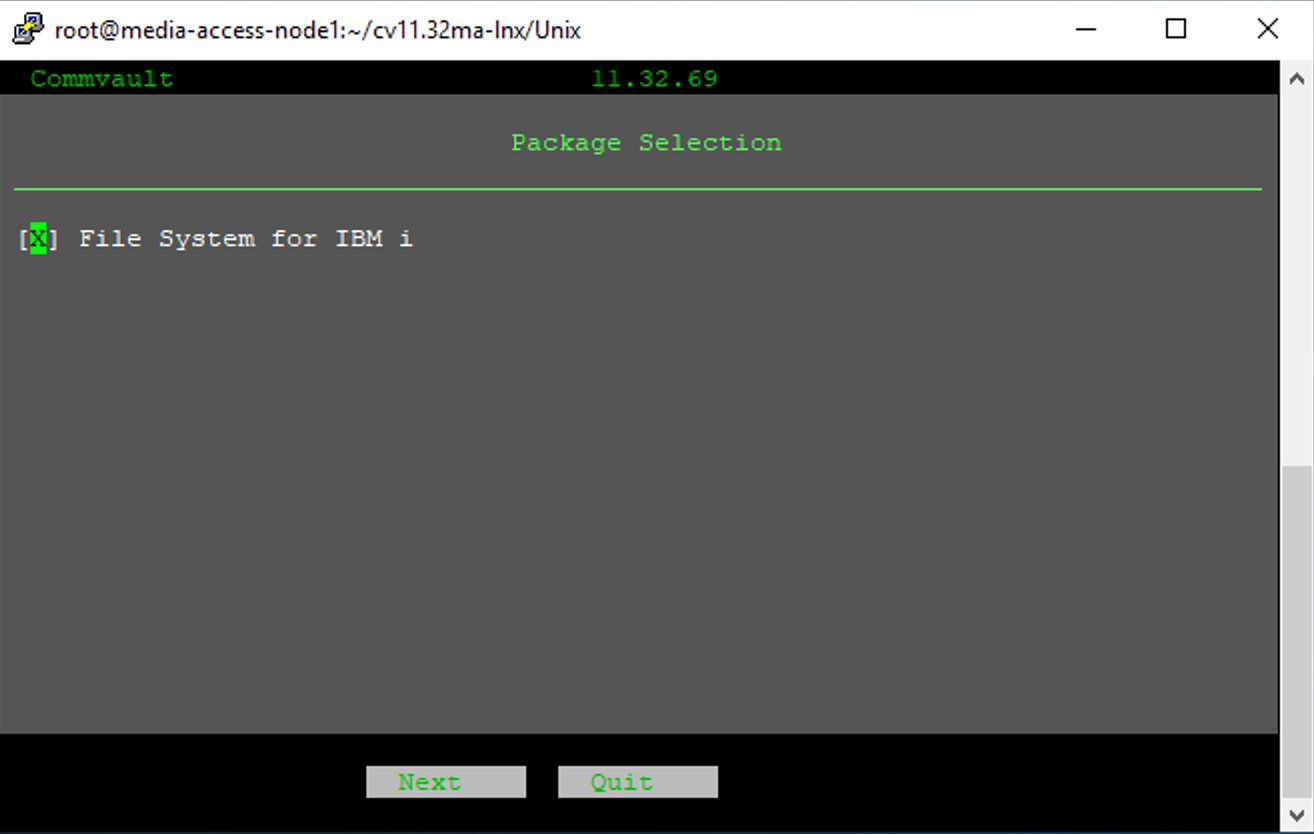
Step 6
In the Package Selection, select File System for IBM i. Click Next.
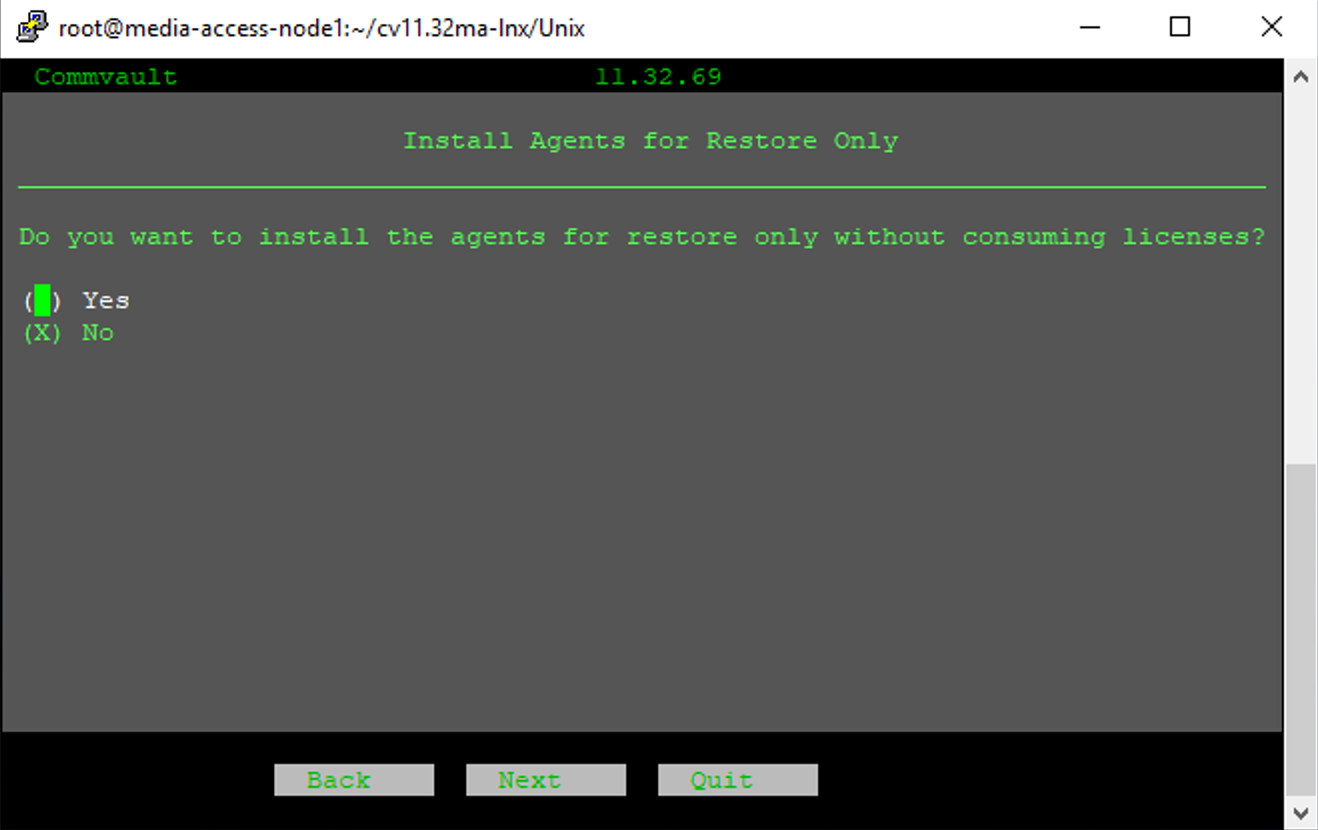
Step 7
On the Install Agents for Restore Only, choose the default No. Click Next.
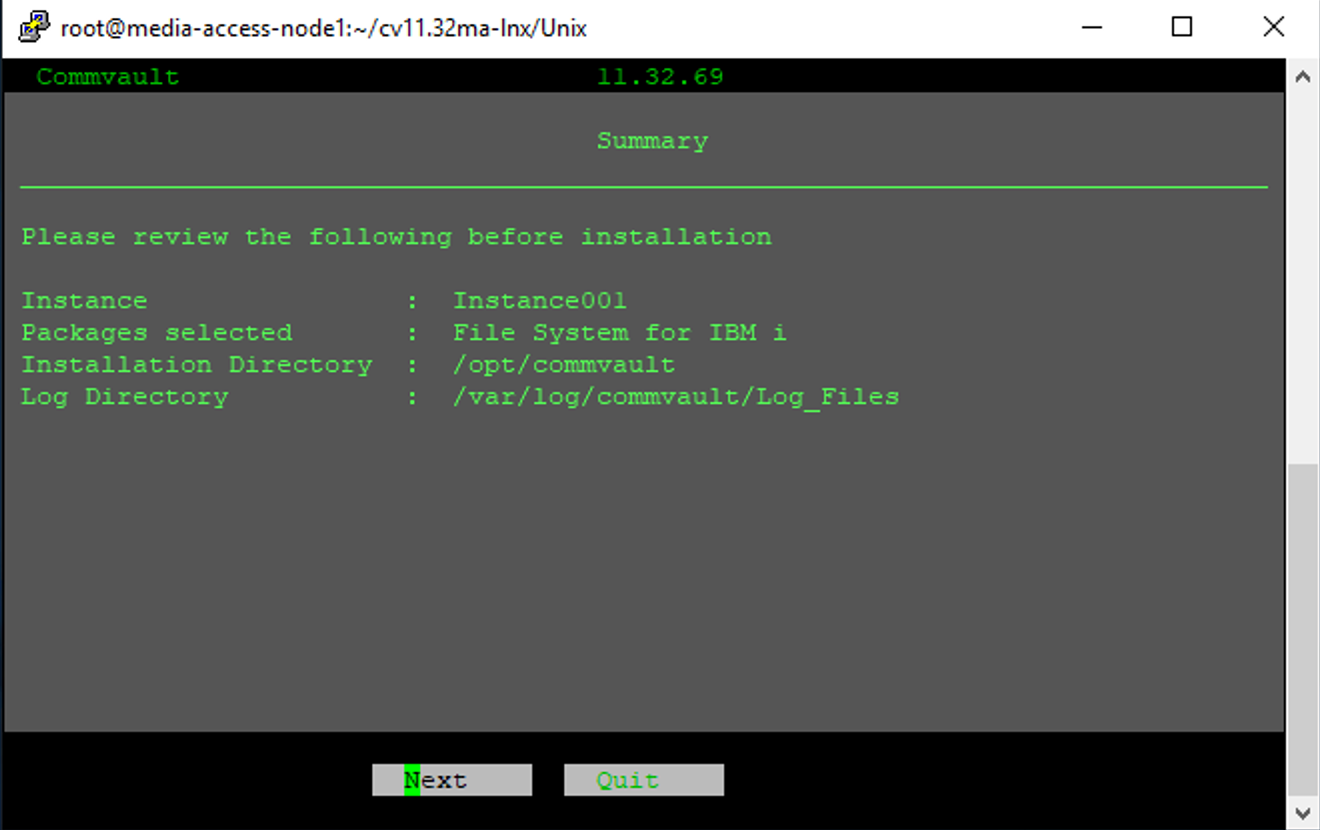
Step 8
On Summary screen, review the selection and click Next.
NOTE: If any option needs to be changed, select Quit and re-run the package installer.
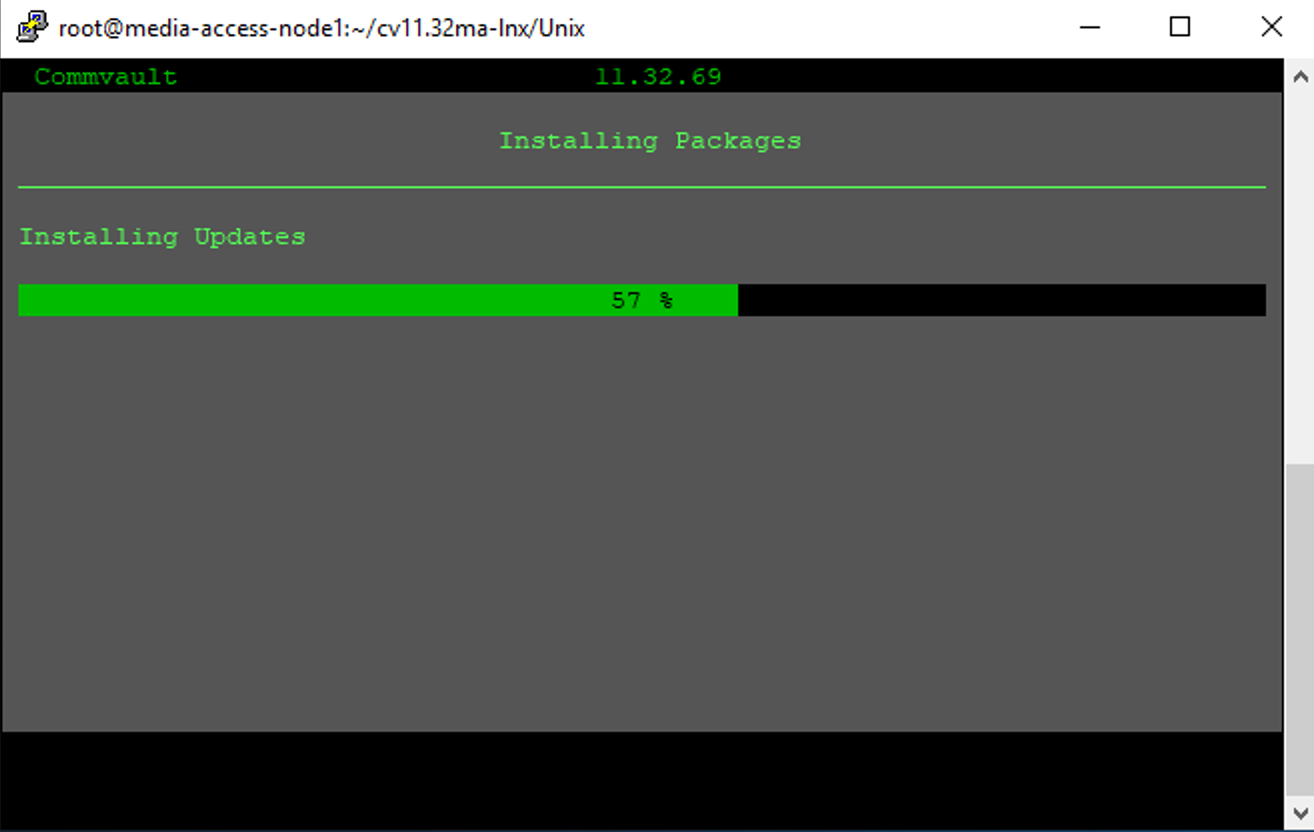
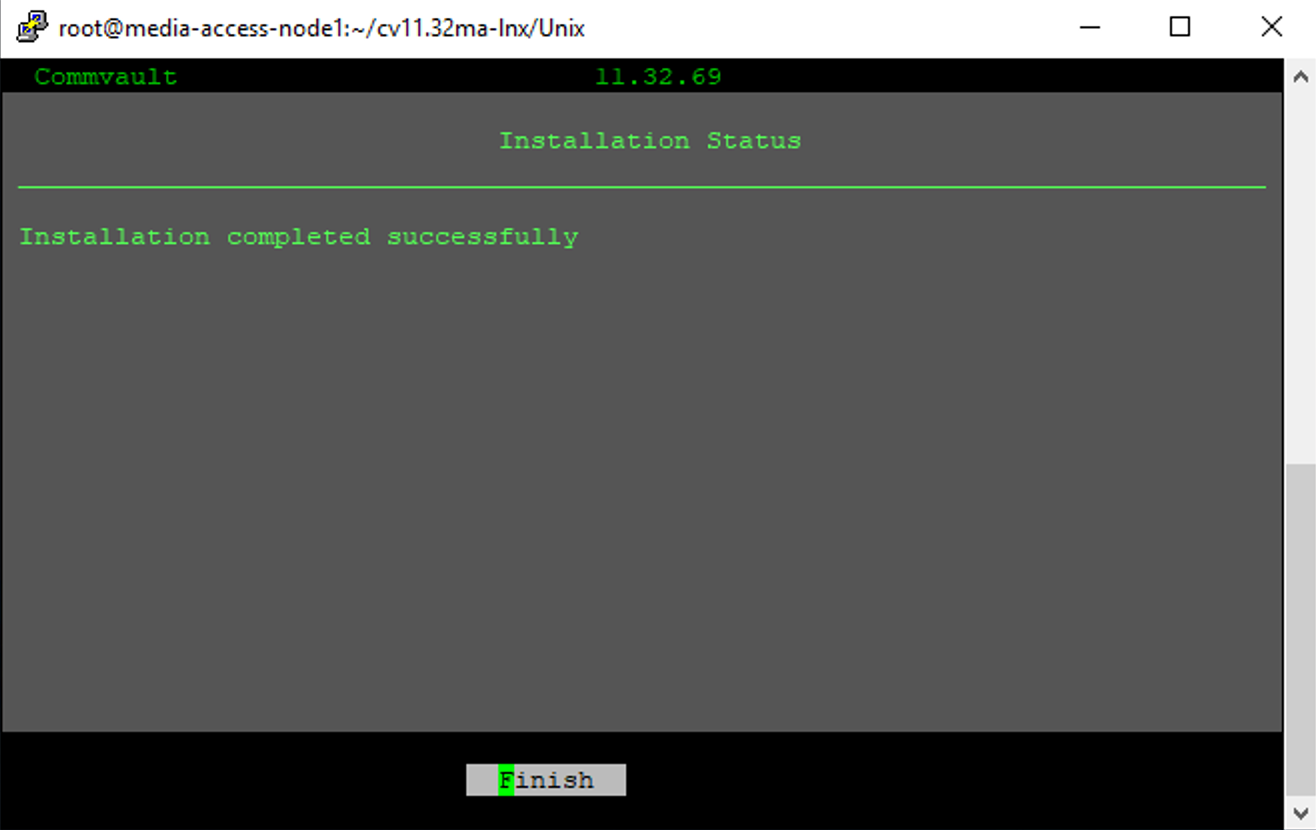
Step 9
Installation will start. When the Installation completed successfully message appears, click Finish.
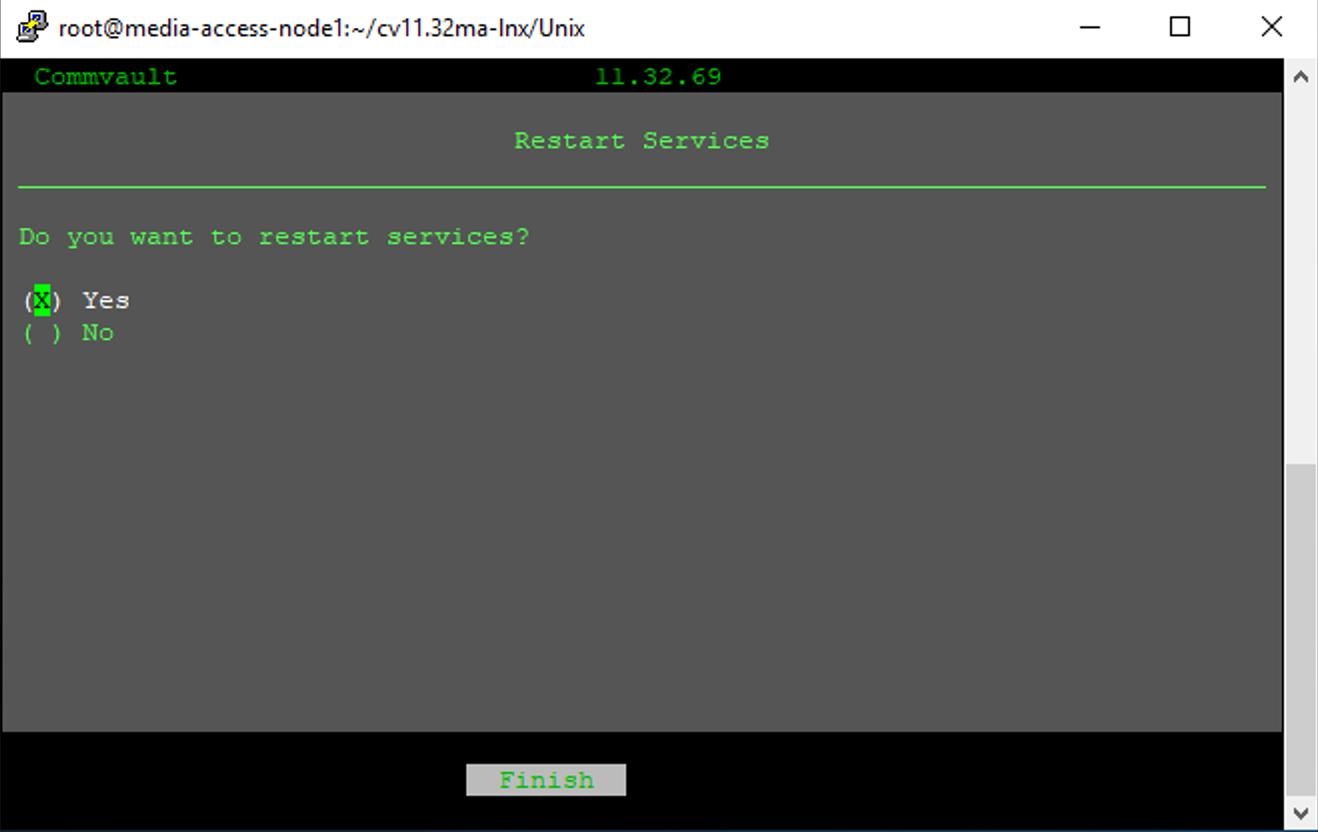
Step 10
On the Restart Services prompt, select Yes then click Finish.
When the package installer has completed, the screen will go back to the command line prompt.
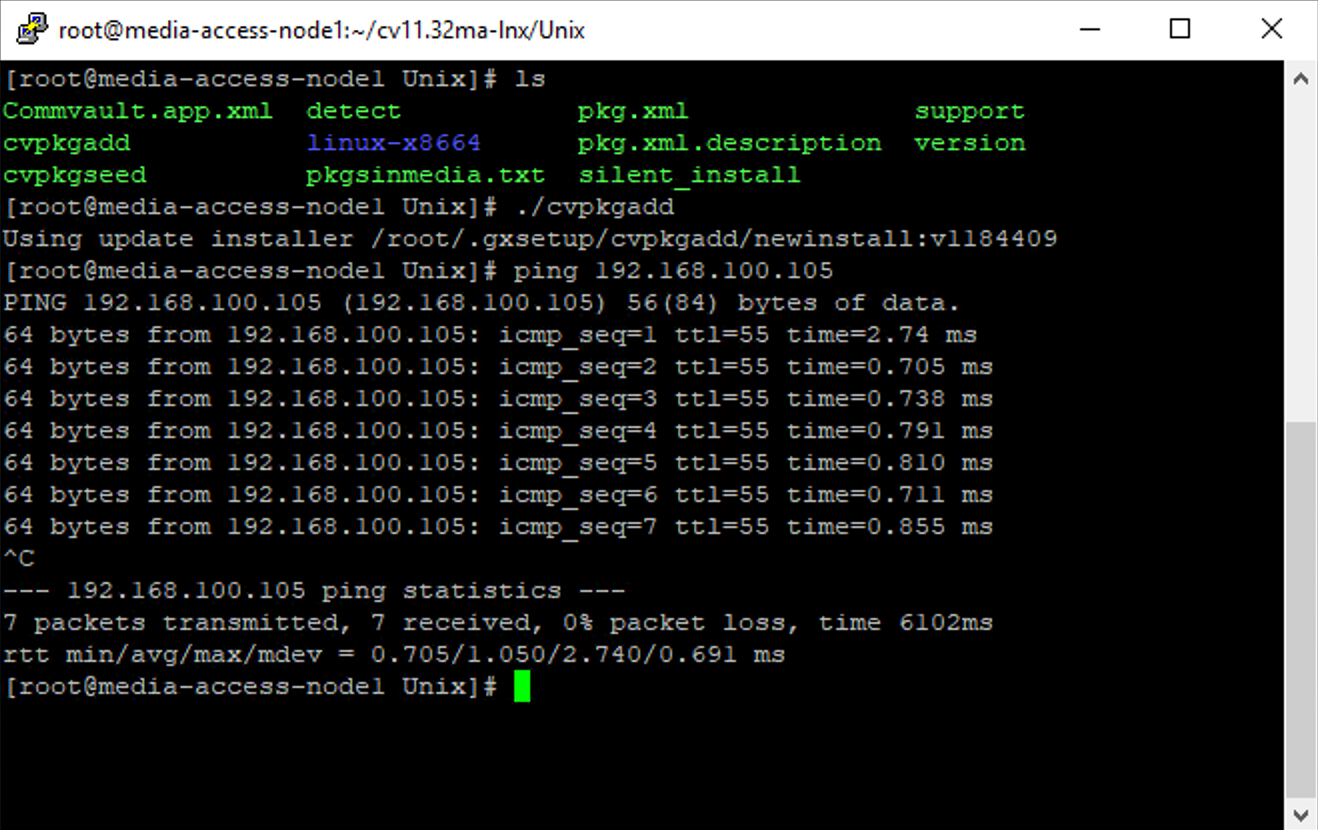
Step 11
On the command line, test the connectivity with the IBM i server. Use the ping command.
Step 12
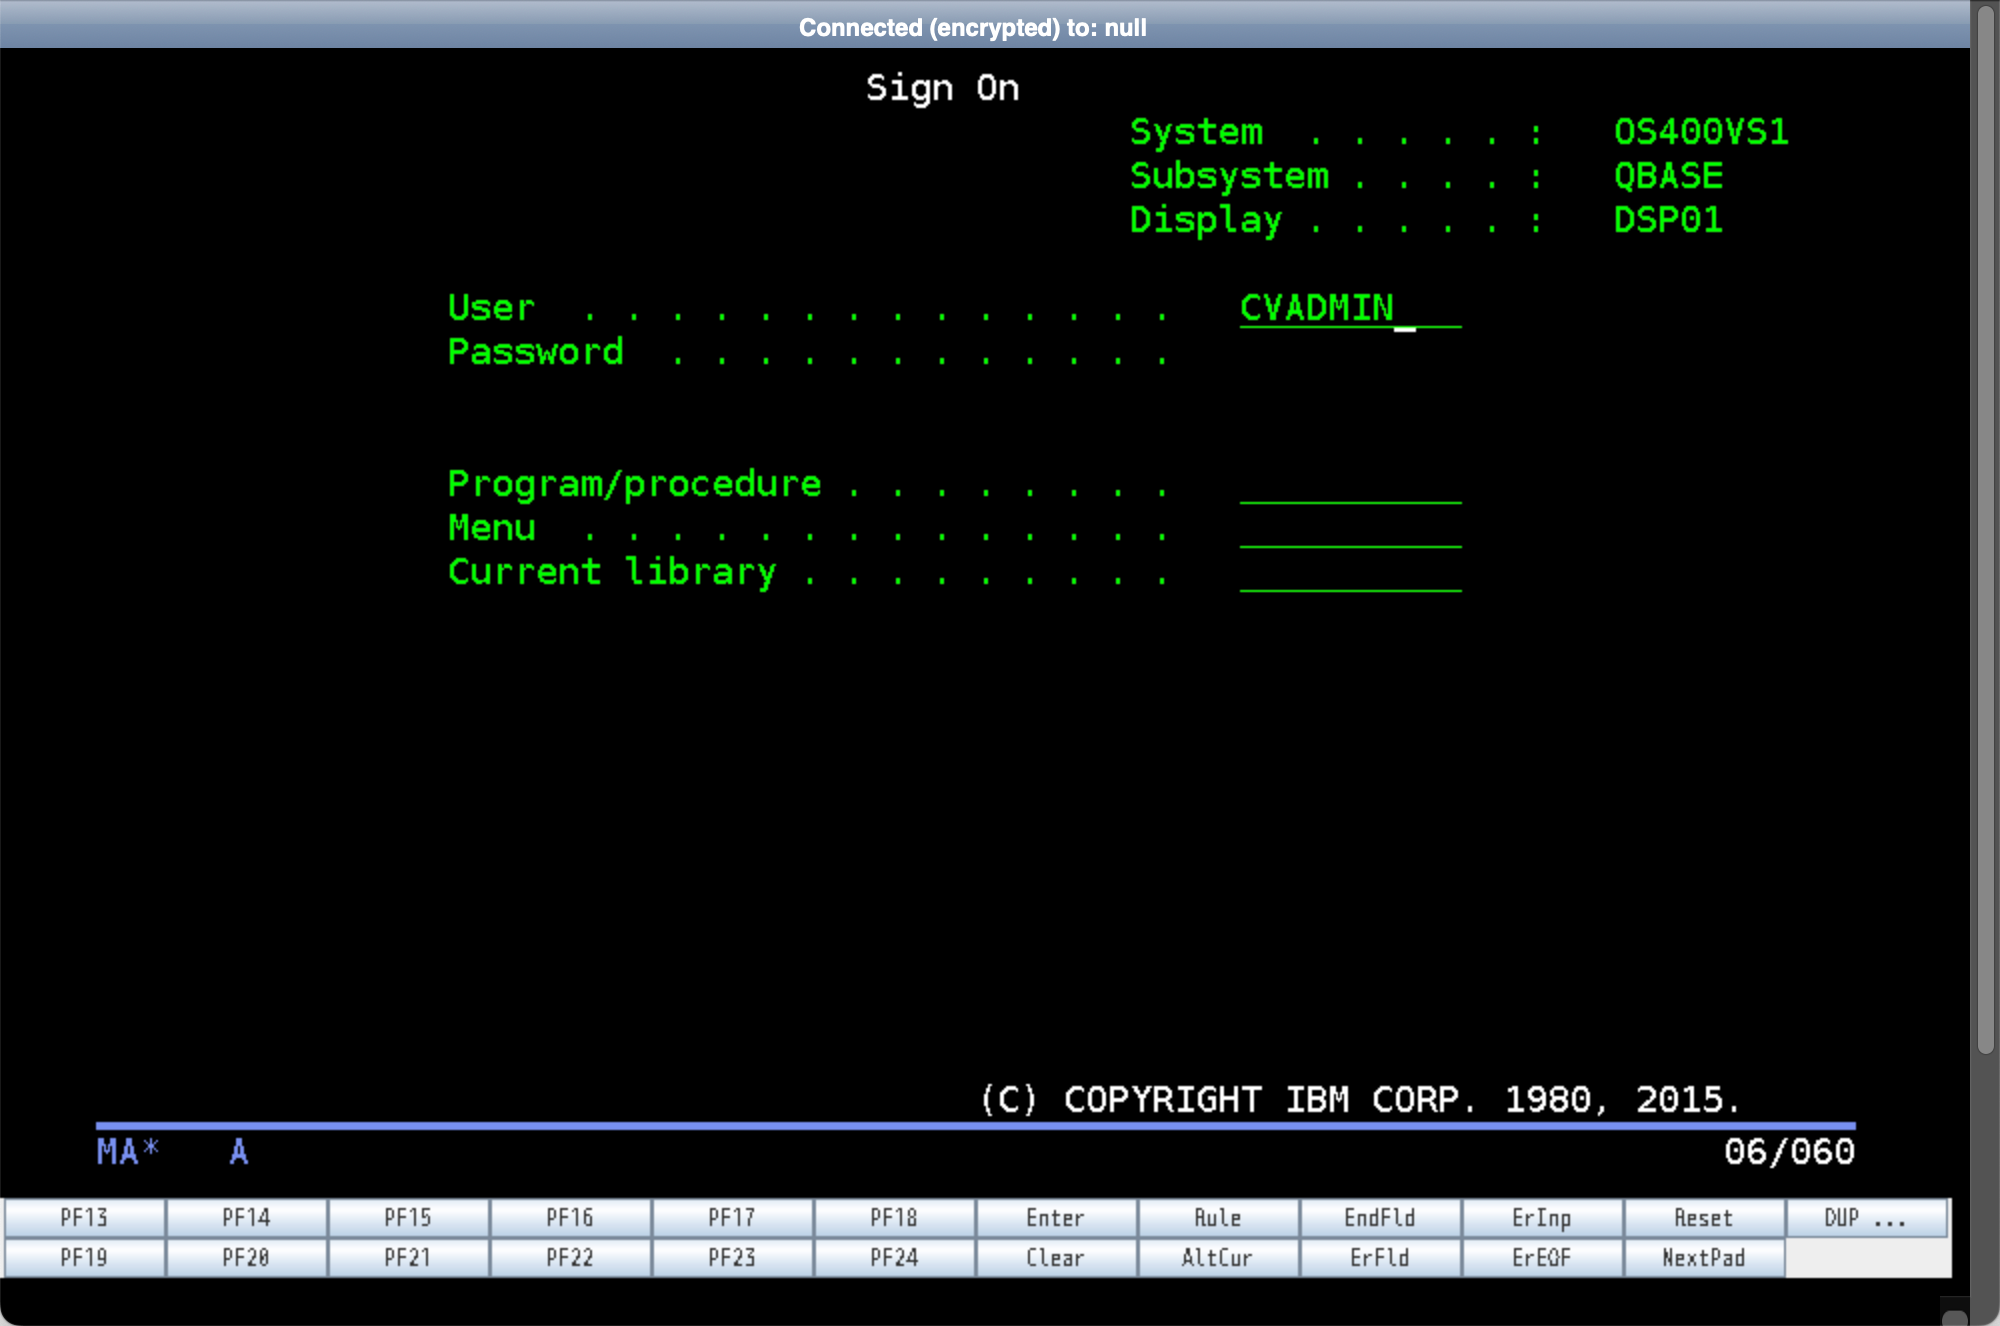
Logon as the Commvault service account created in previous posts.
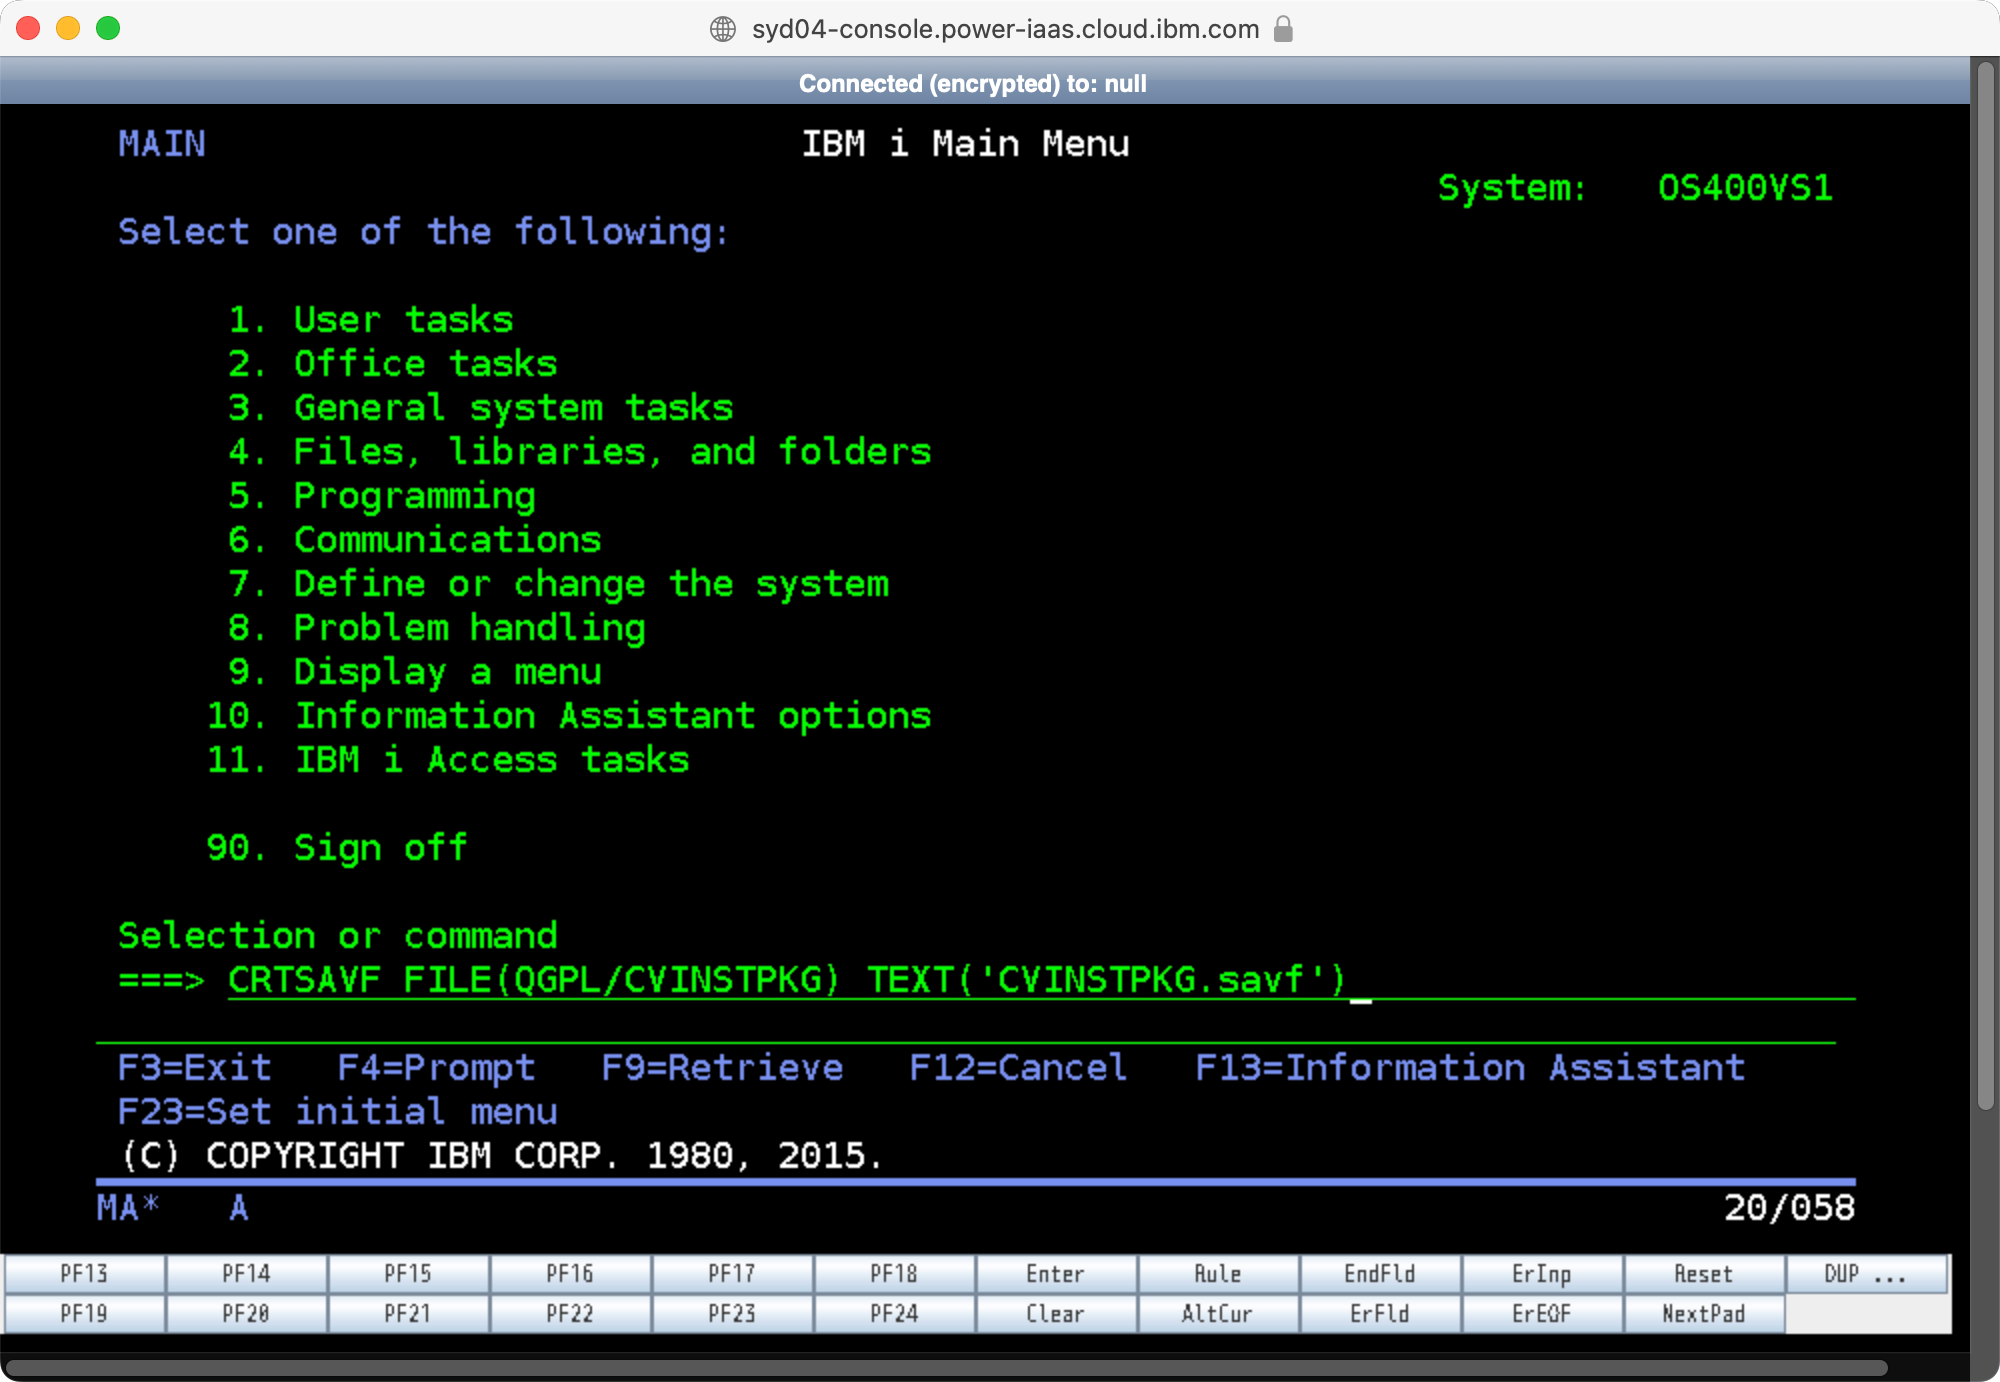
Step 13
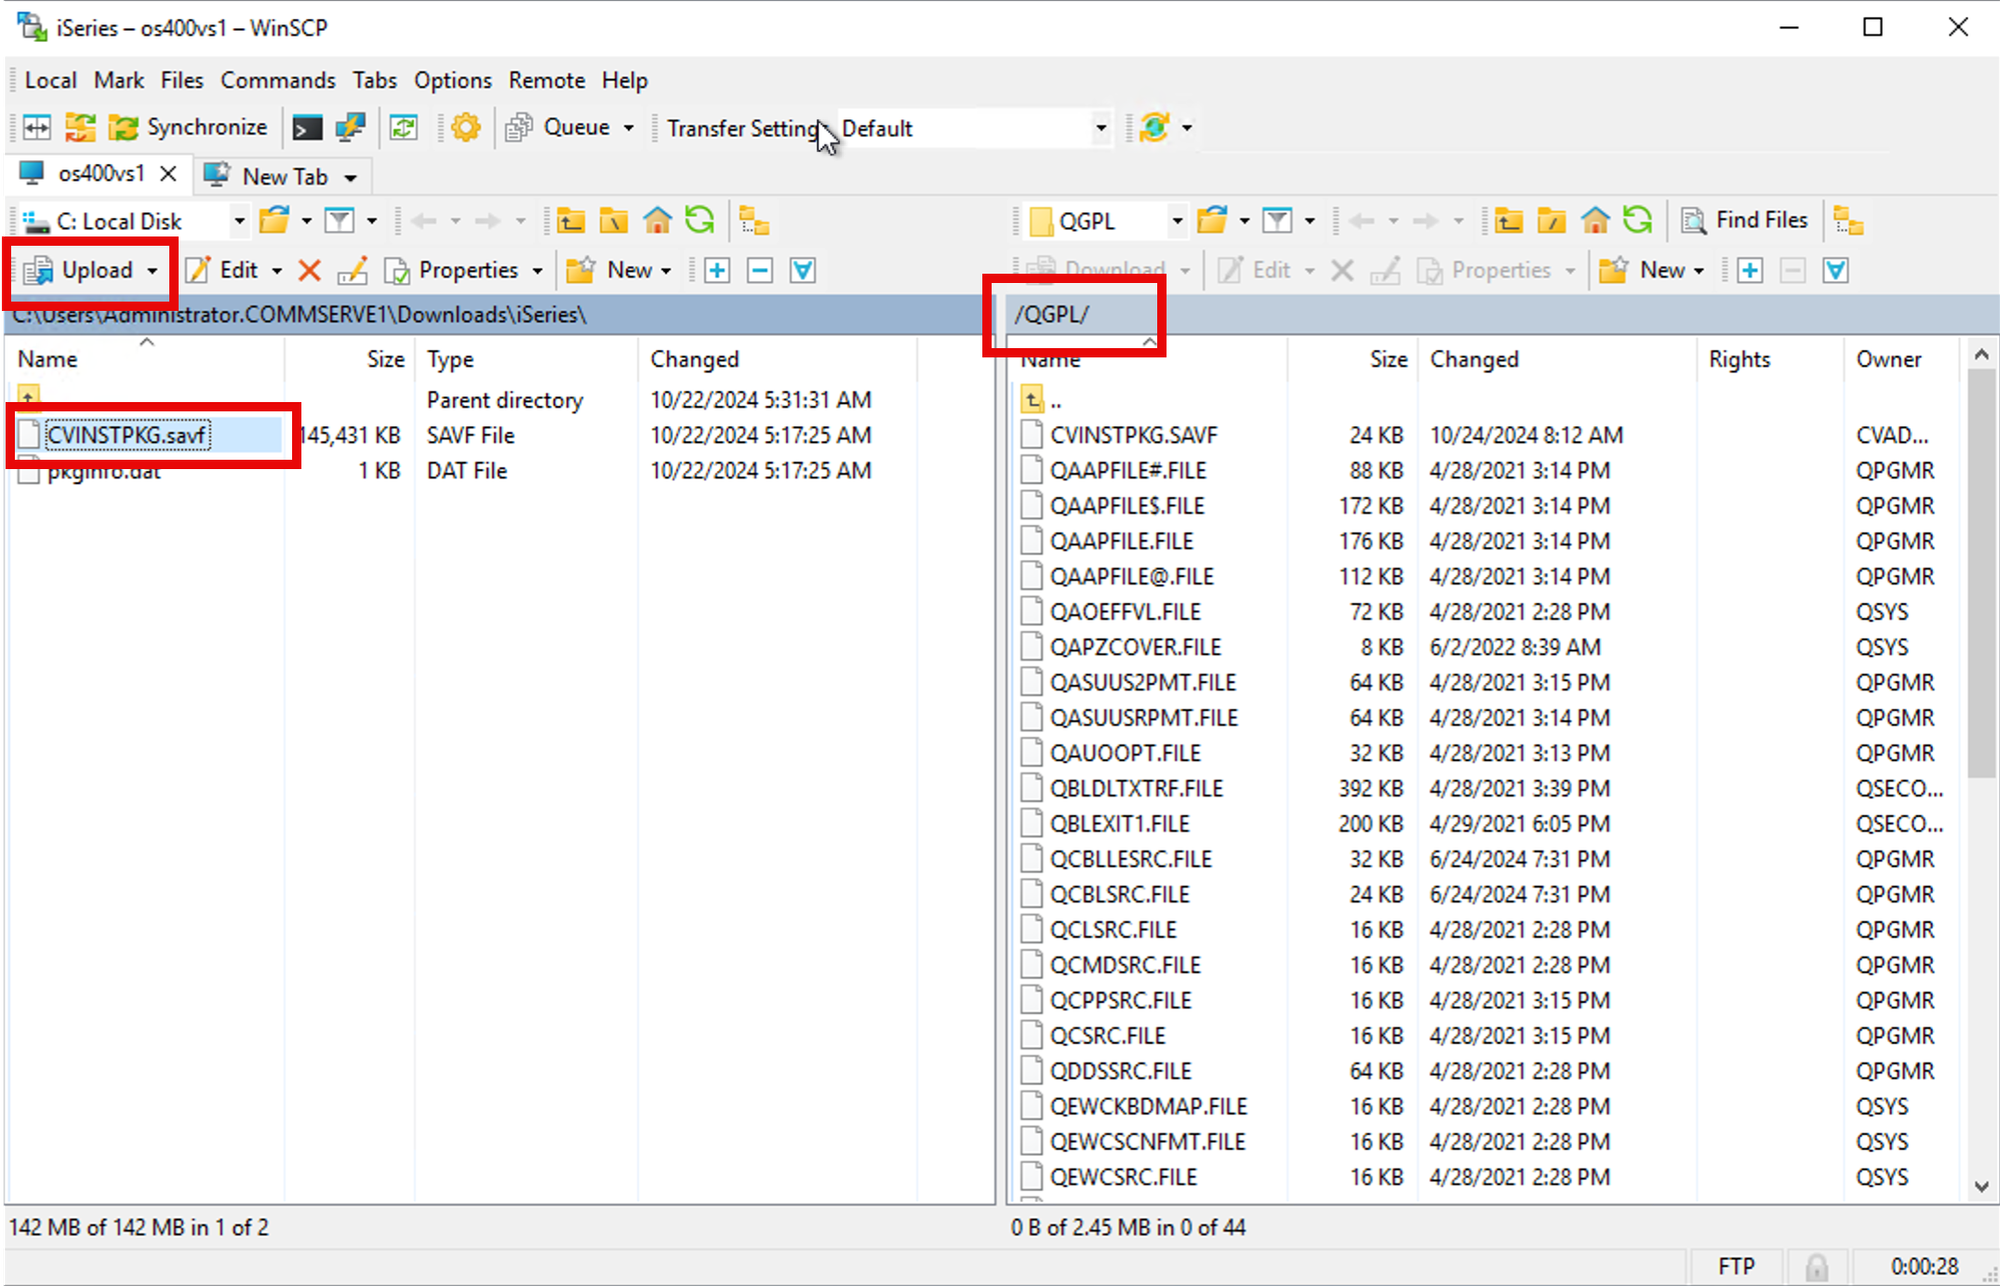
On the IBM i client, create a save file that will be used to receive the installation save file from the proxy client. The file must be located within the General-Purpose Library (QGPL).

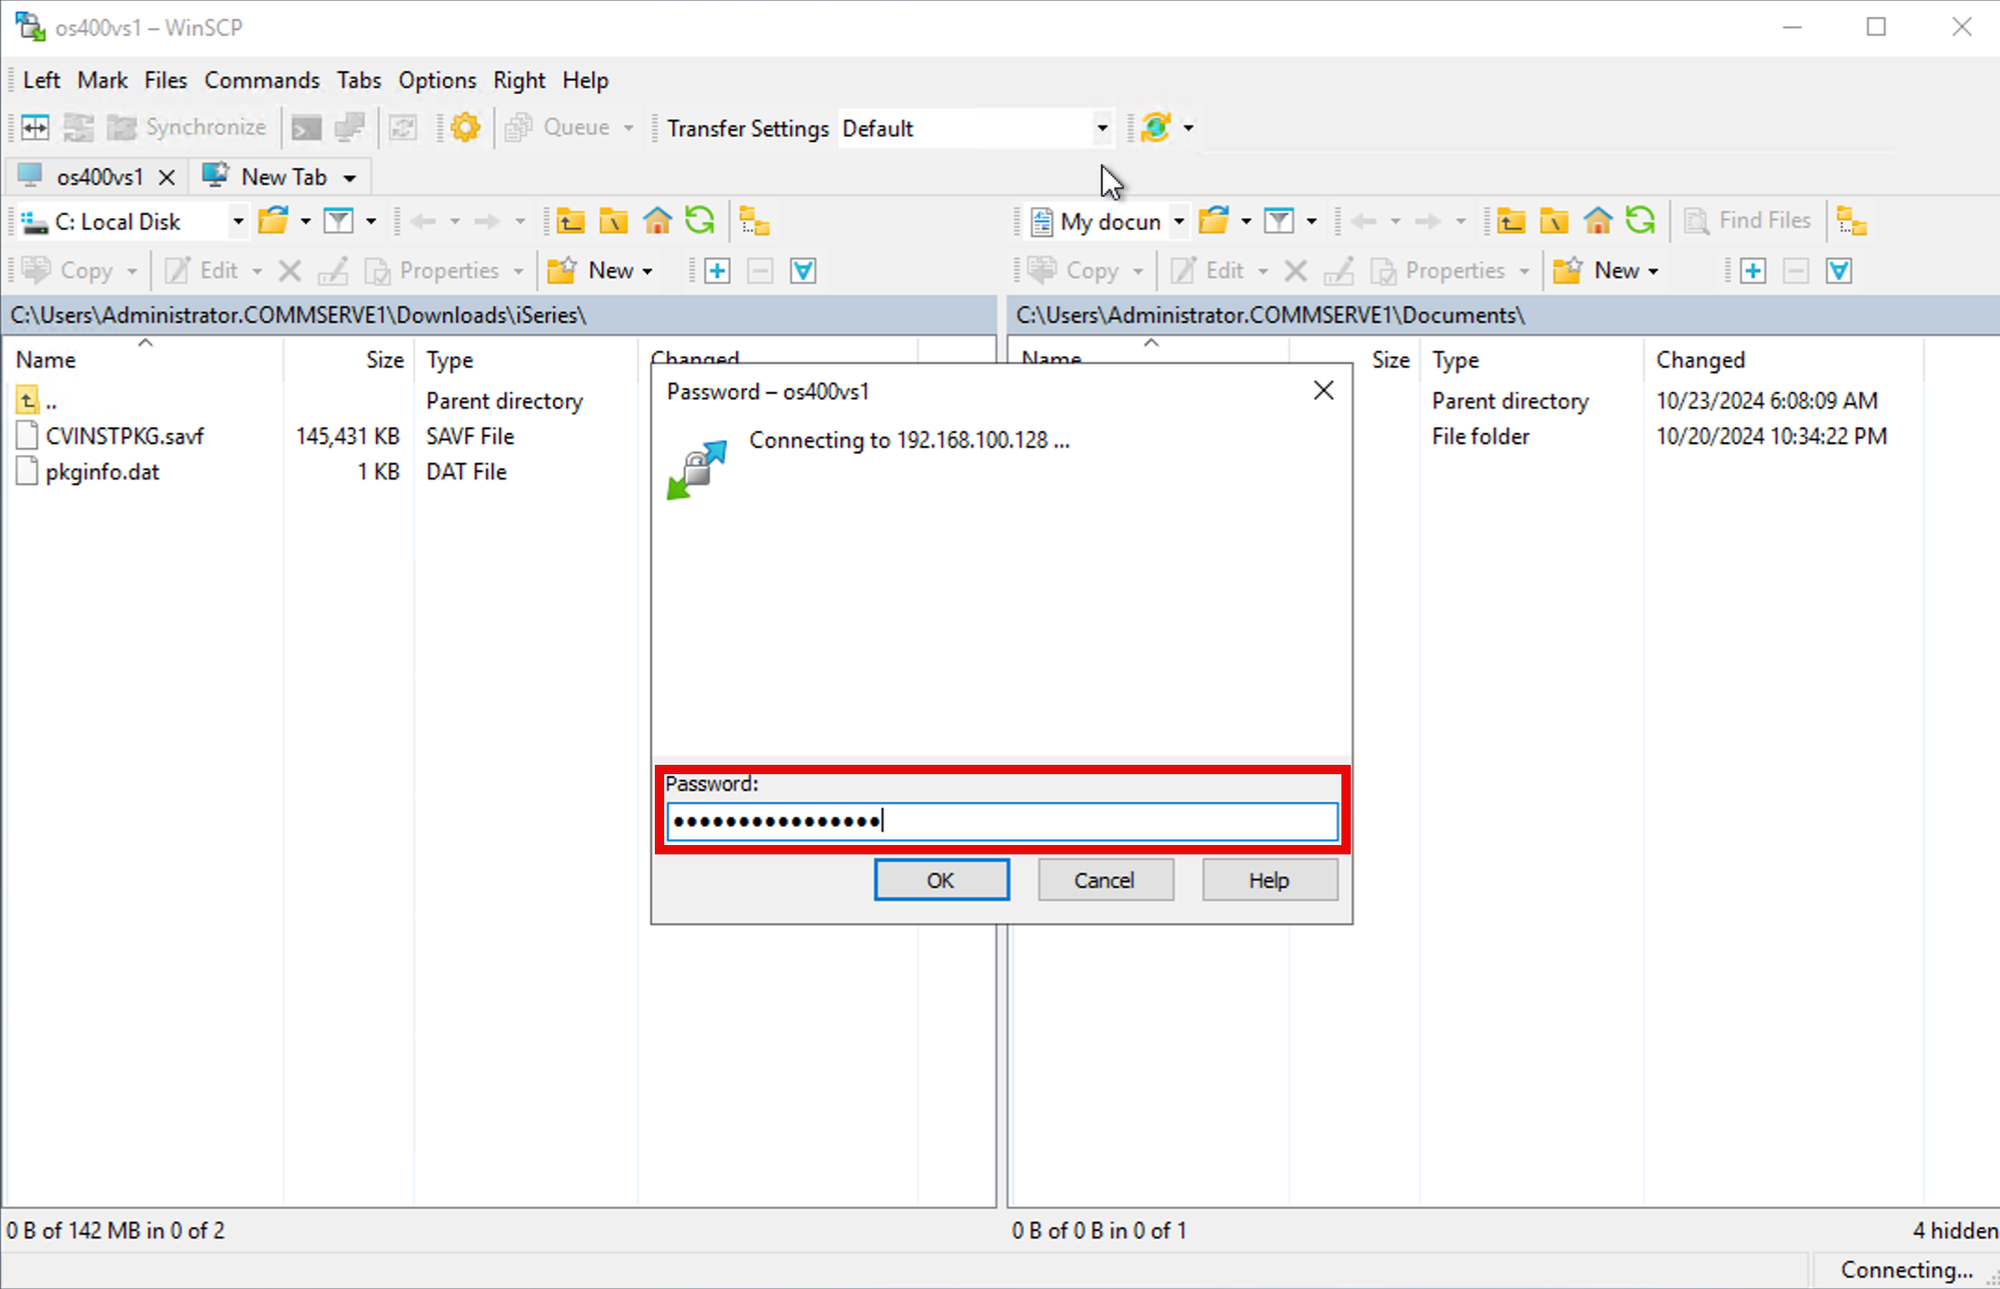
Step 14
Use a File Transfer to upload the Commvault installation file using FTP.
I have already downloaded the IBM i installation file from the Linux Proxy server.
I am using WinSCP and logging on the IBMi server using the CVADMIN Commvault service account. Click Login.

Step 15
Enter the password. Click OK.
Step 16
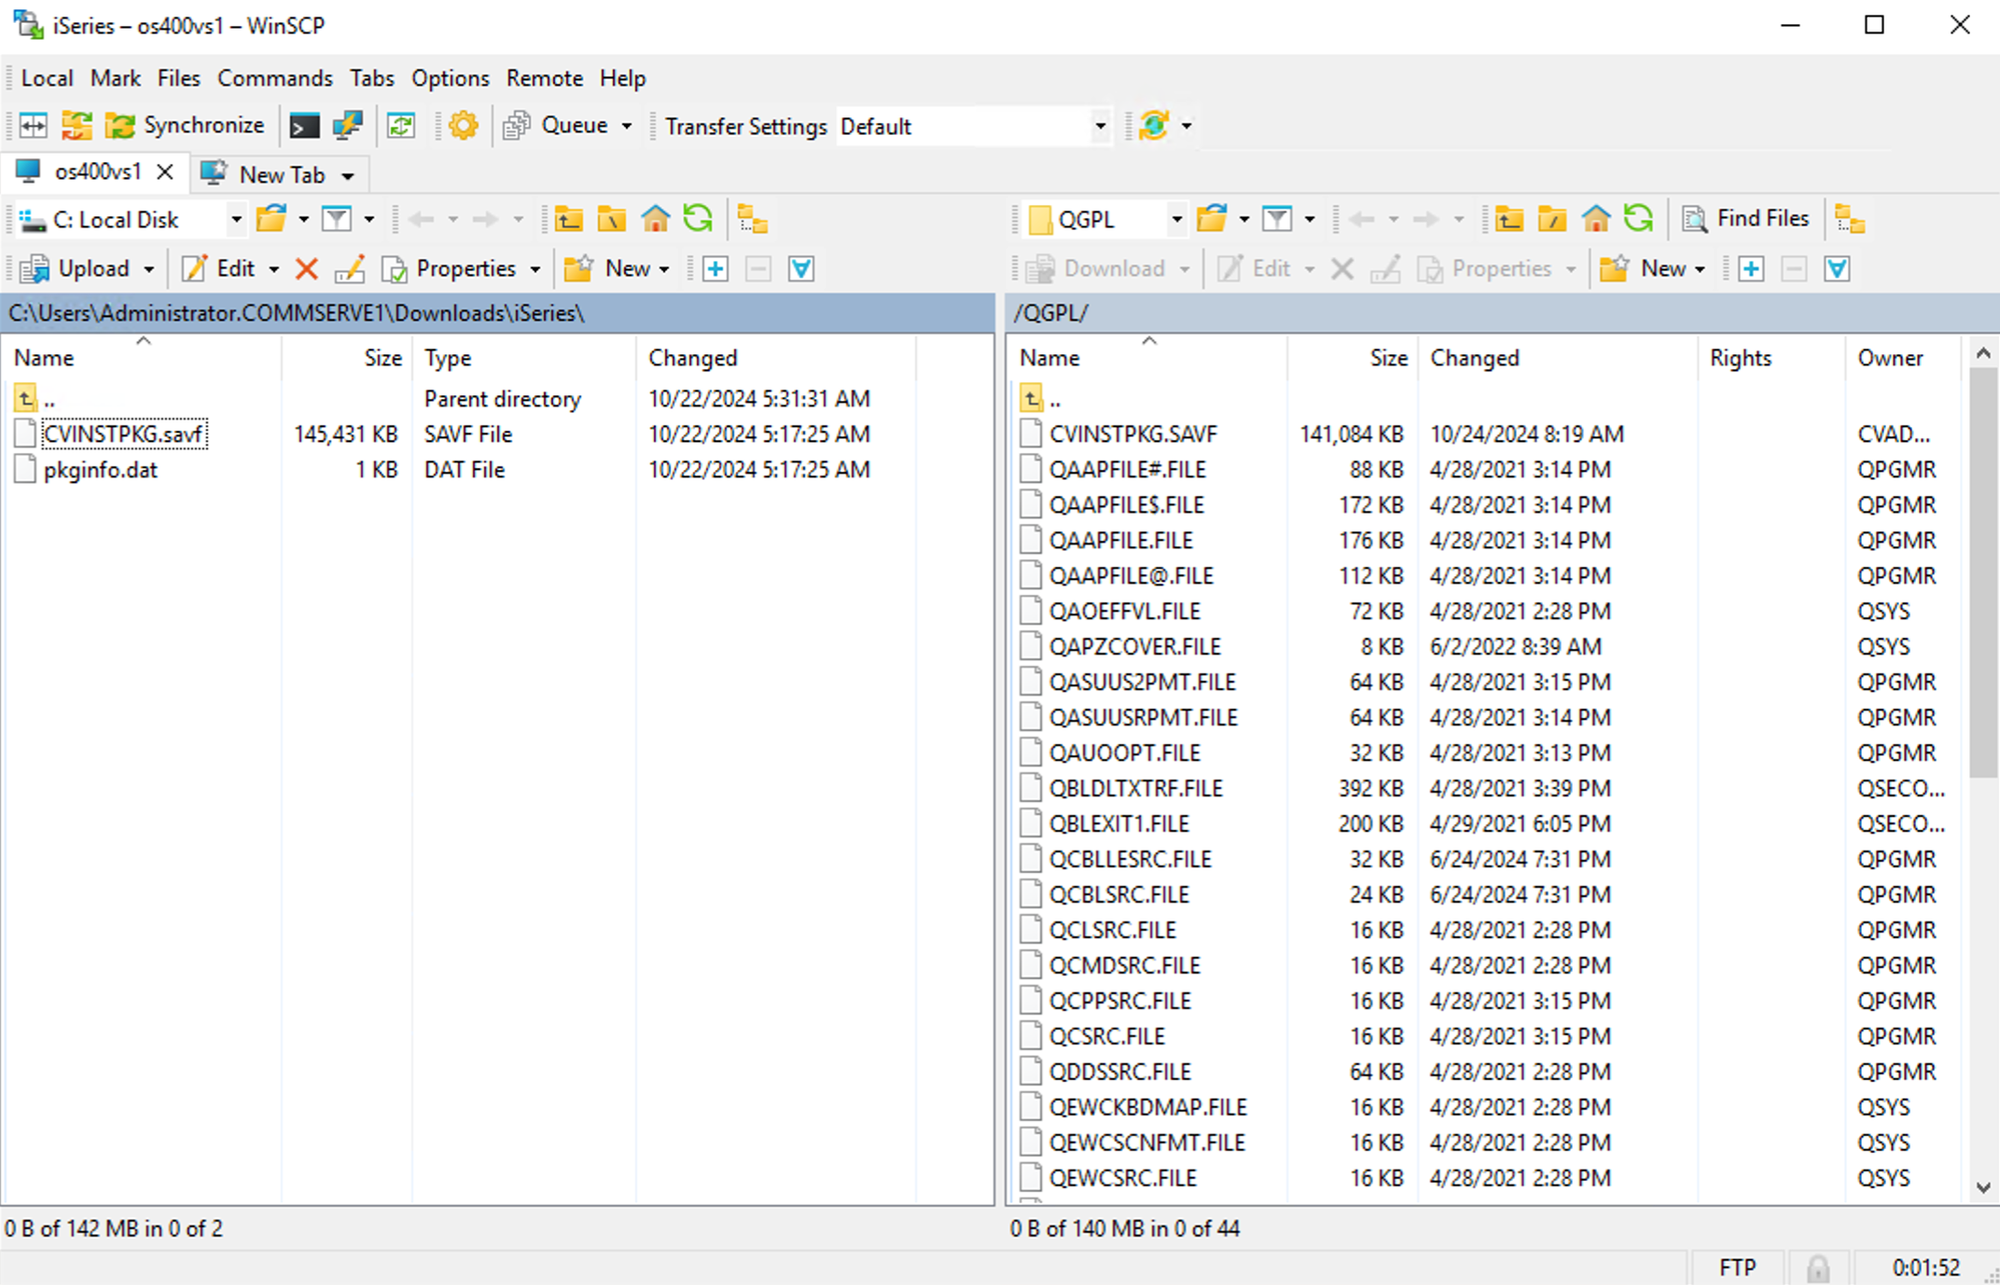
Locate the IBM i installation file. Confirm the destination folder /QGPL/.
Click Upload.
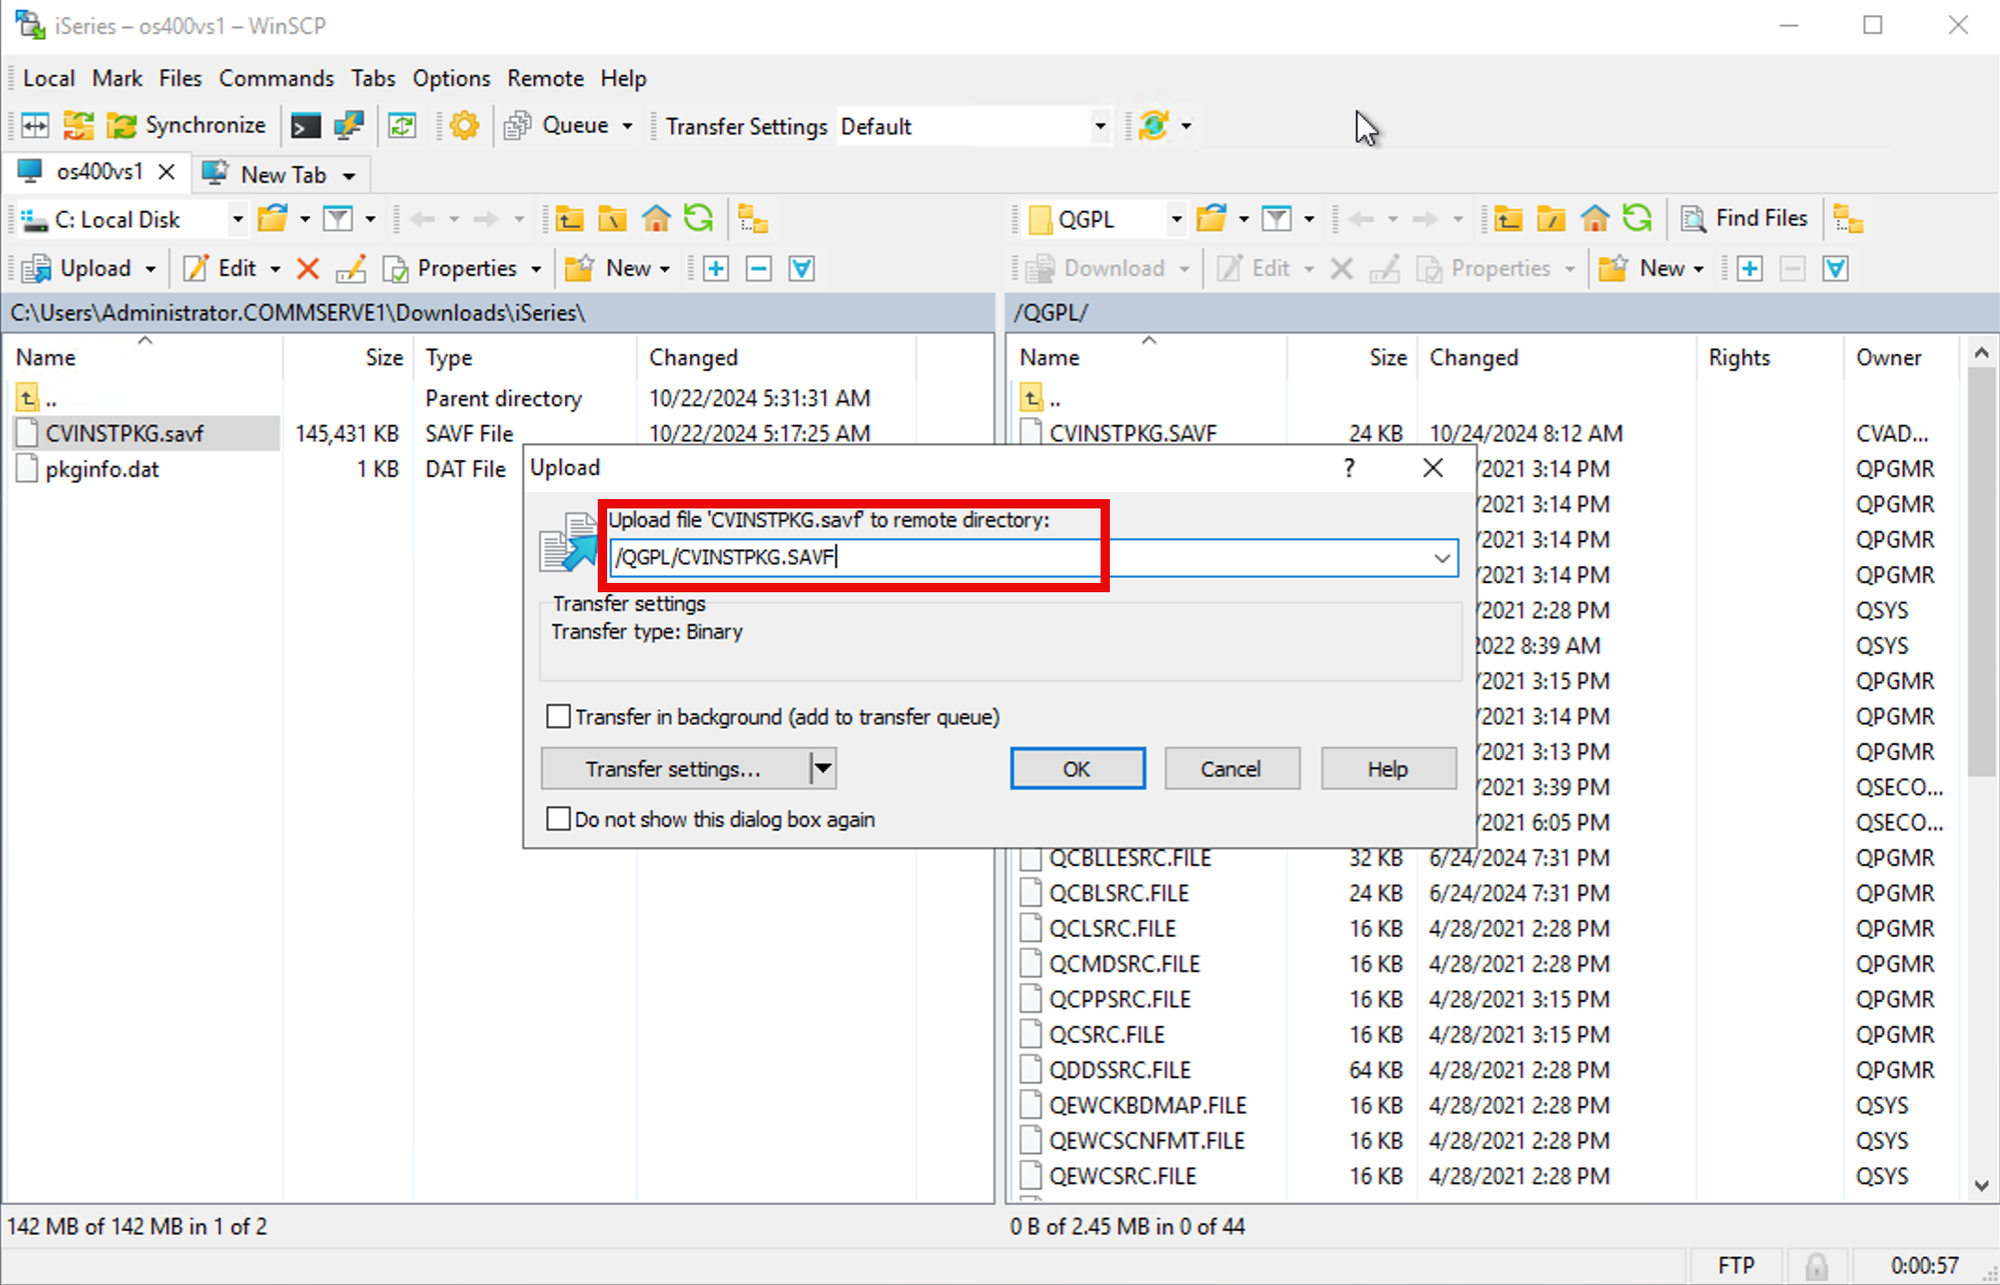
Step 17
Enter the destination file as shown. Click OK.
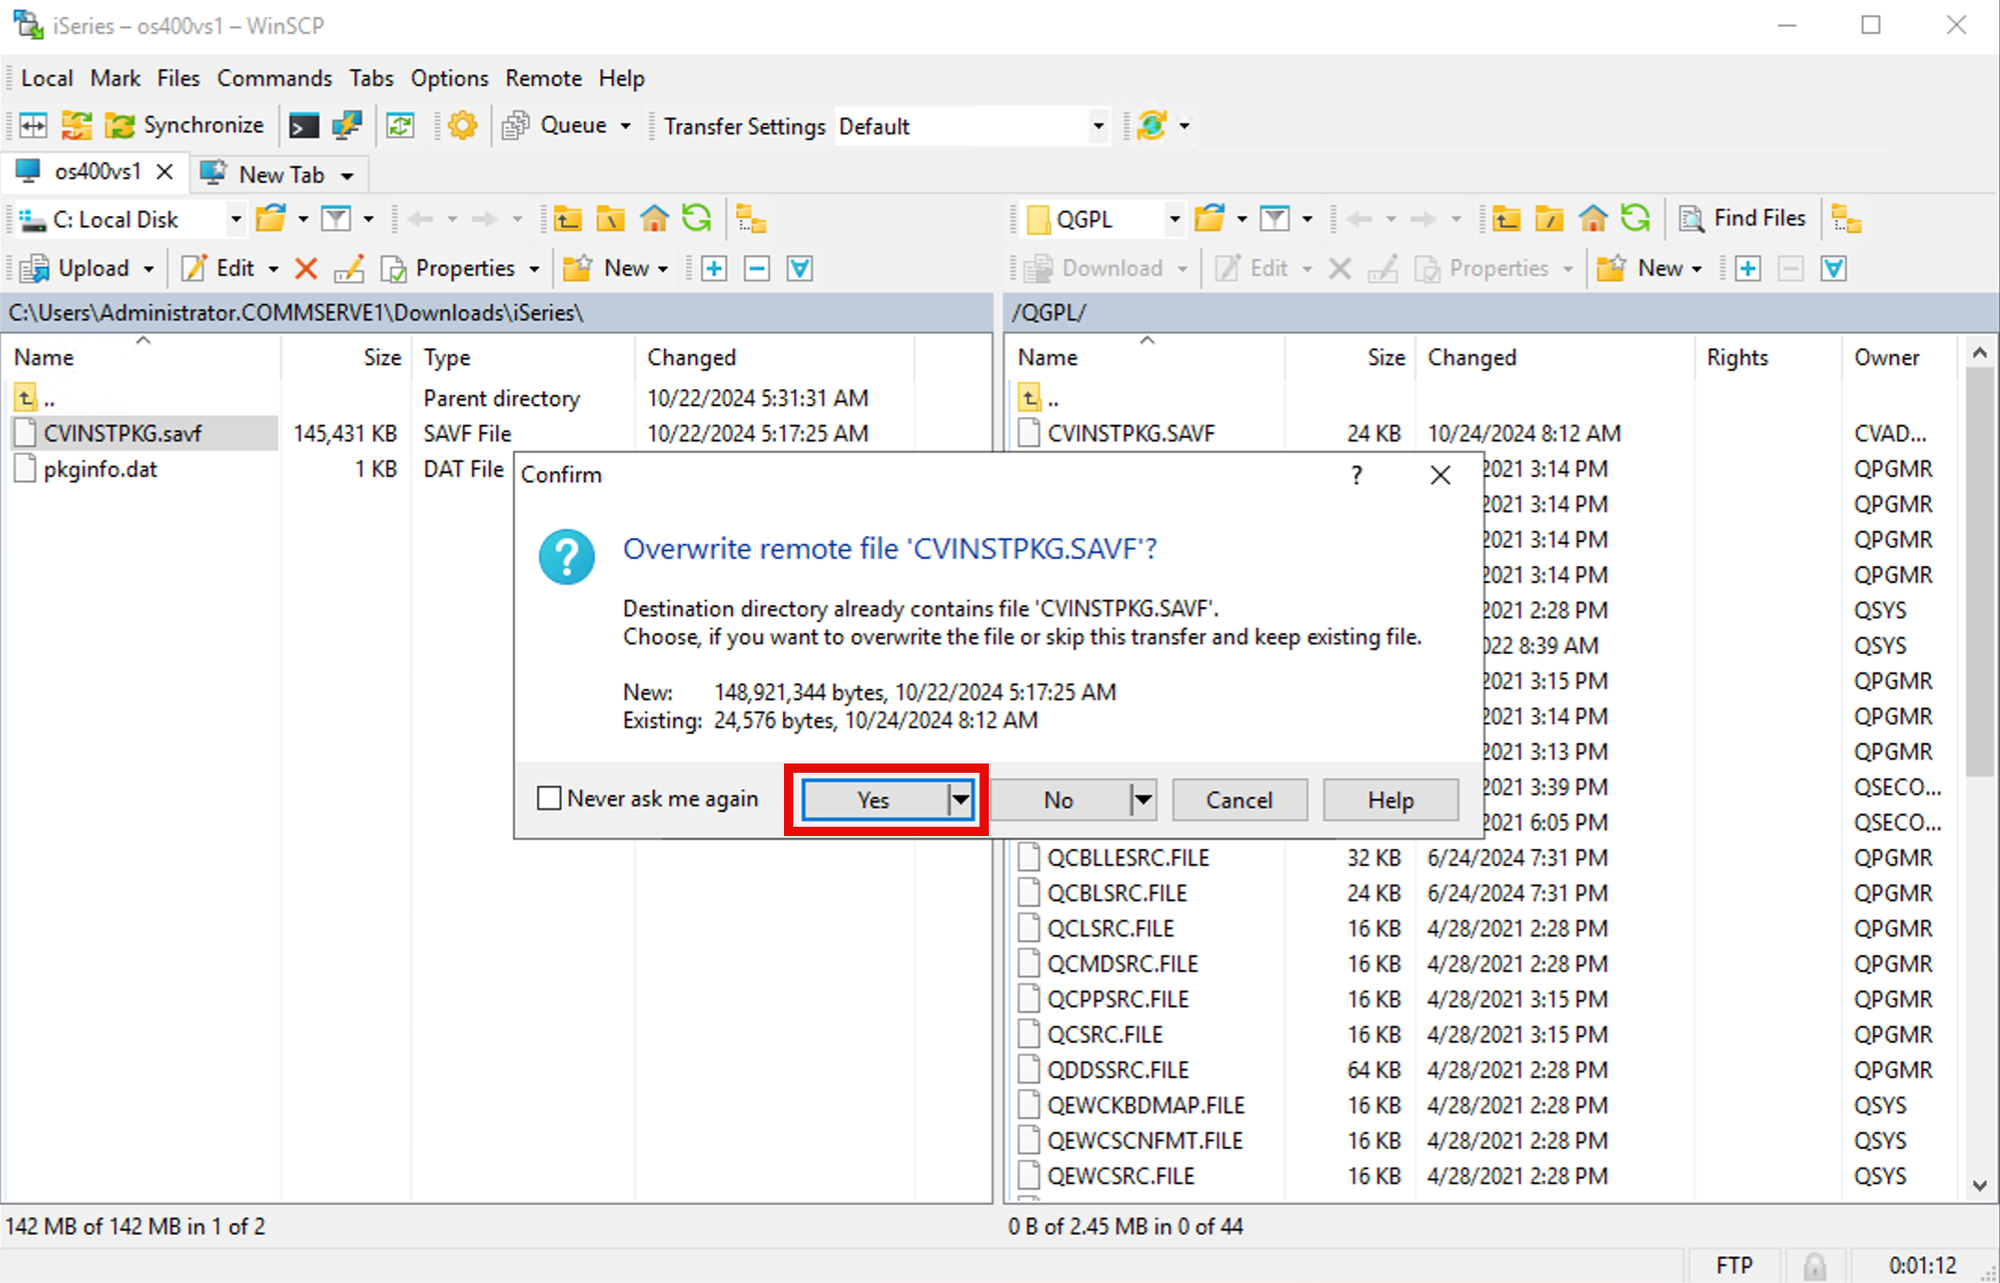
Step 18
Confirm overwrite of destination file. Click Yes.
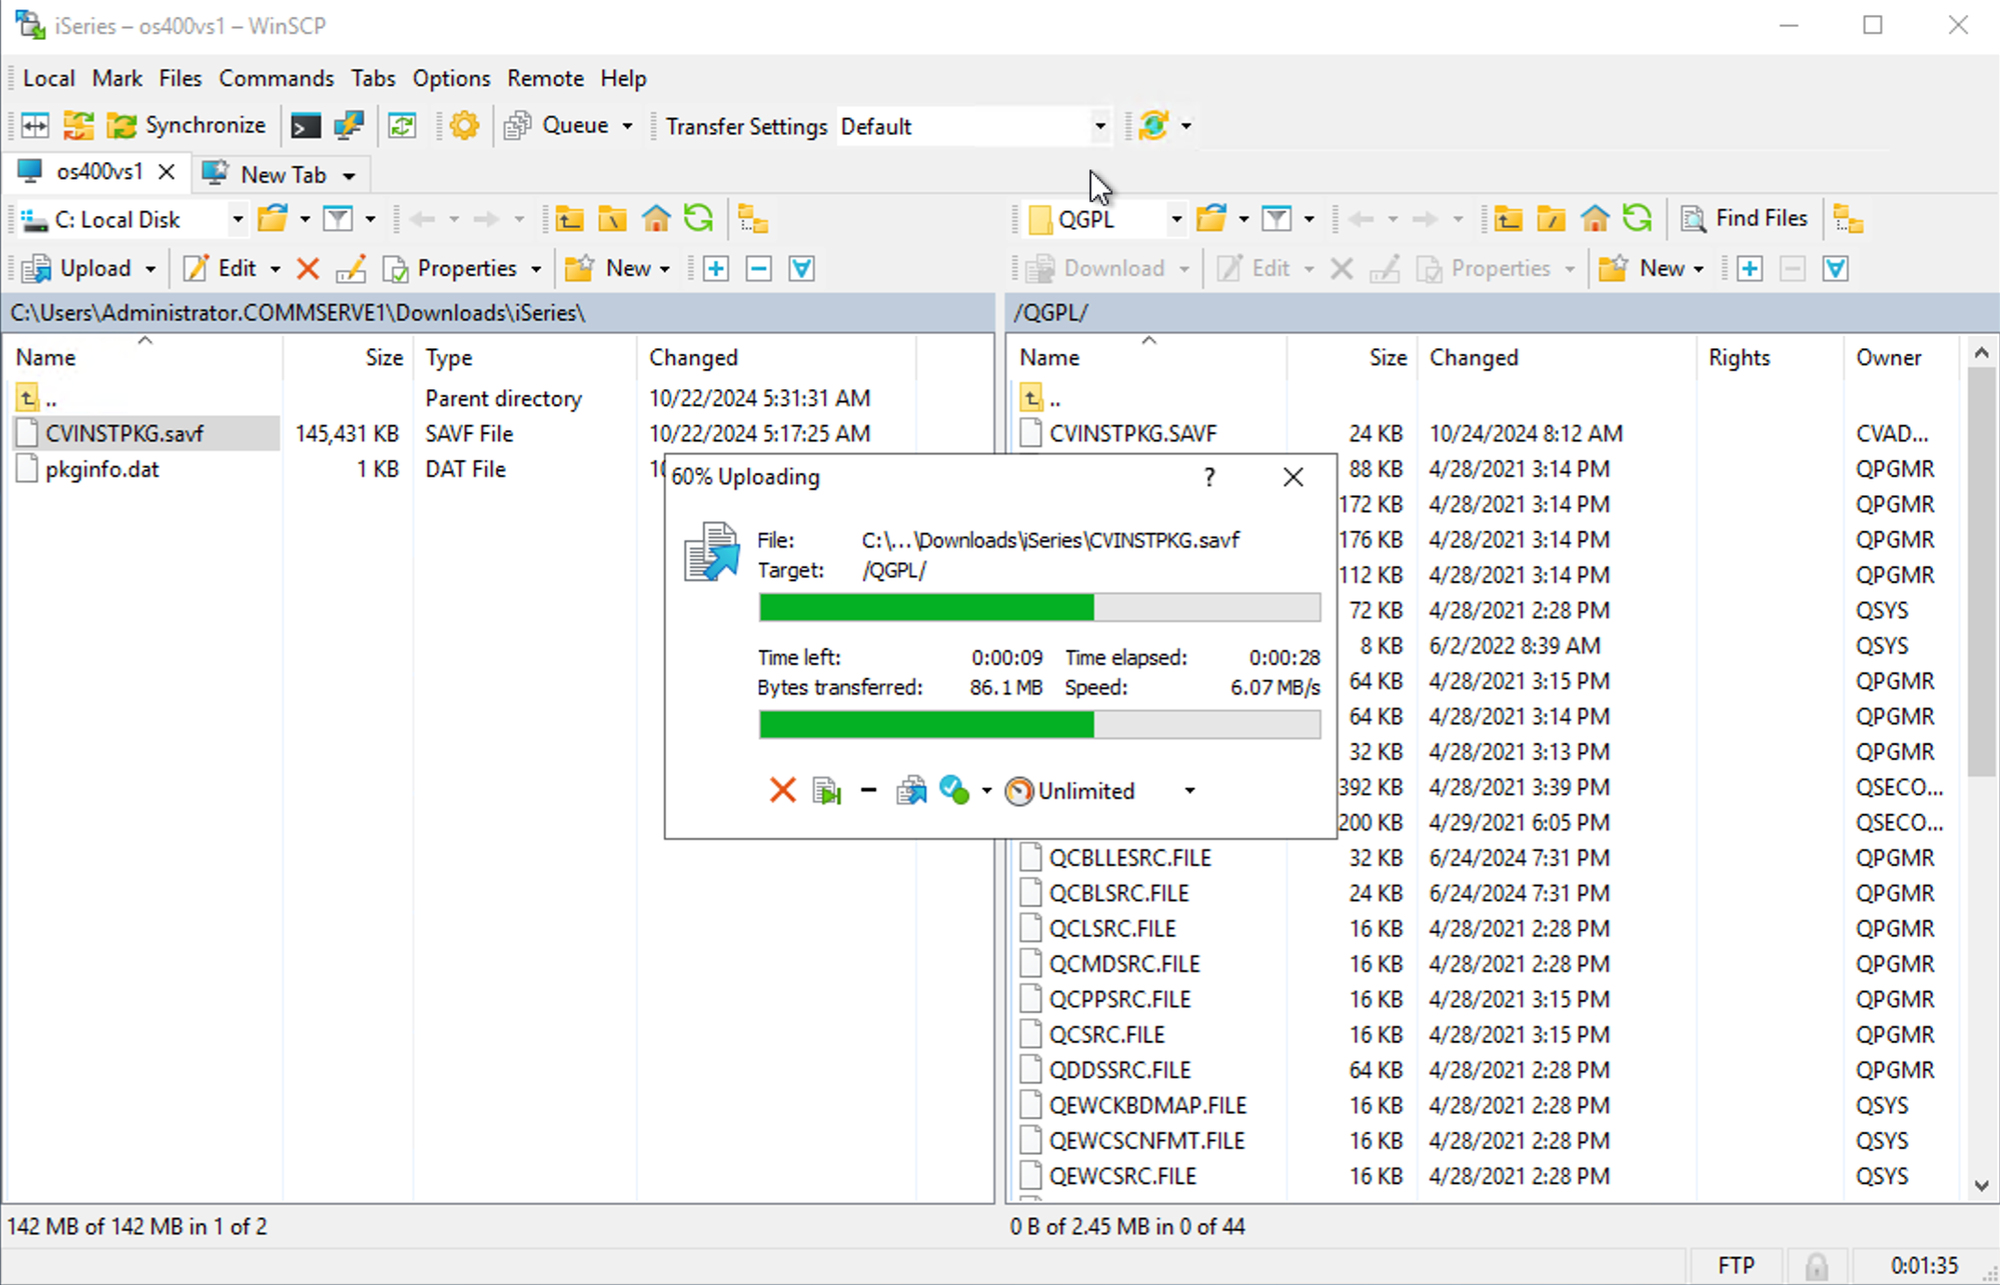
Step 19
Transfer status.
Step 20
Confirm file size.
Step 21
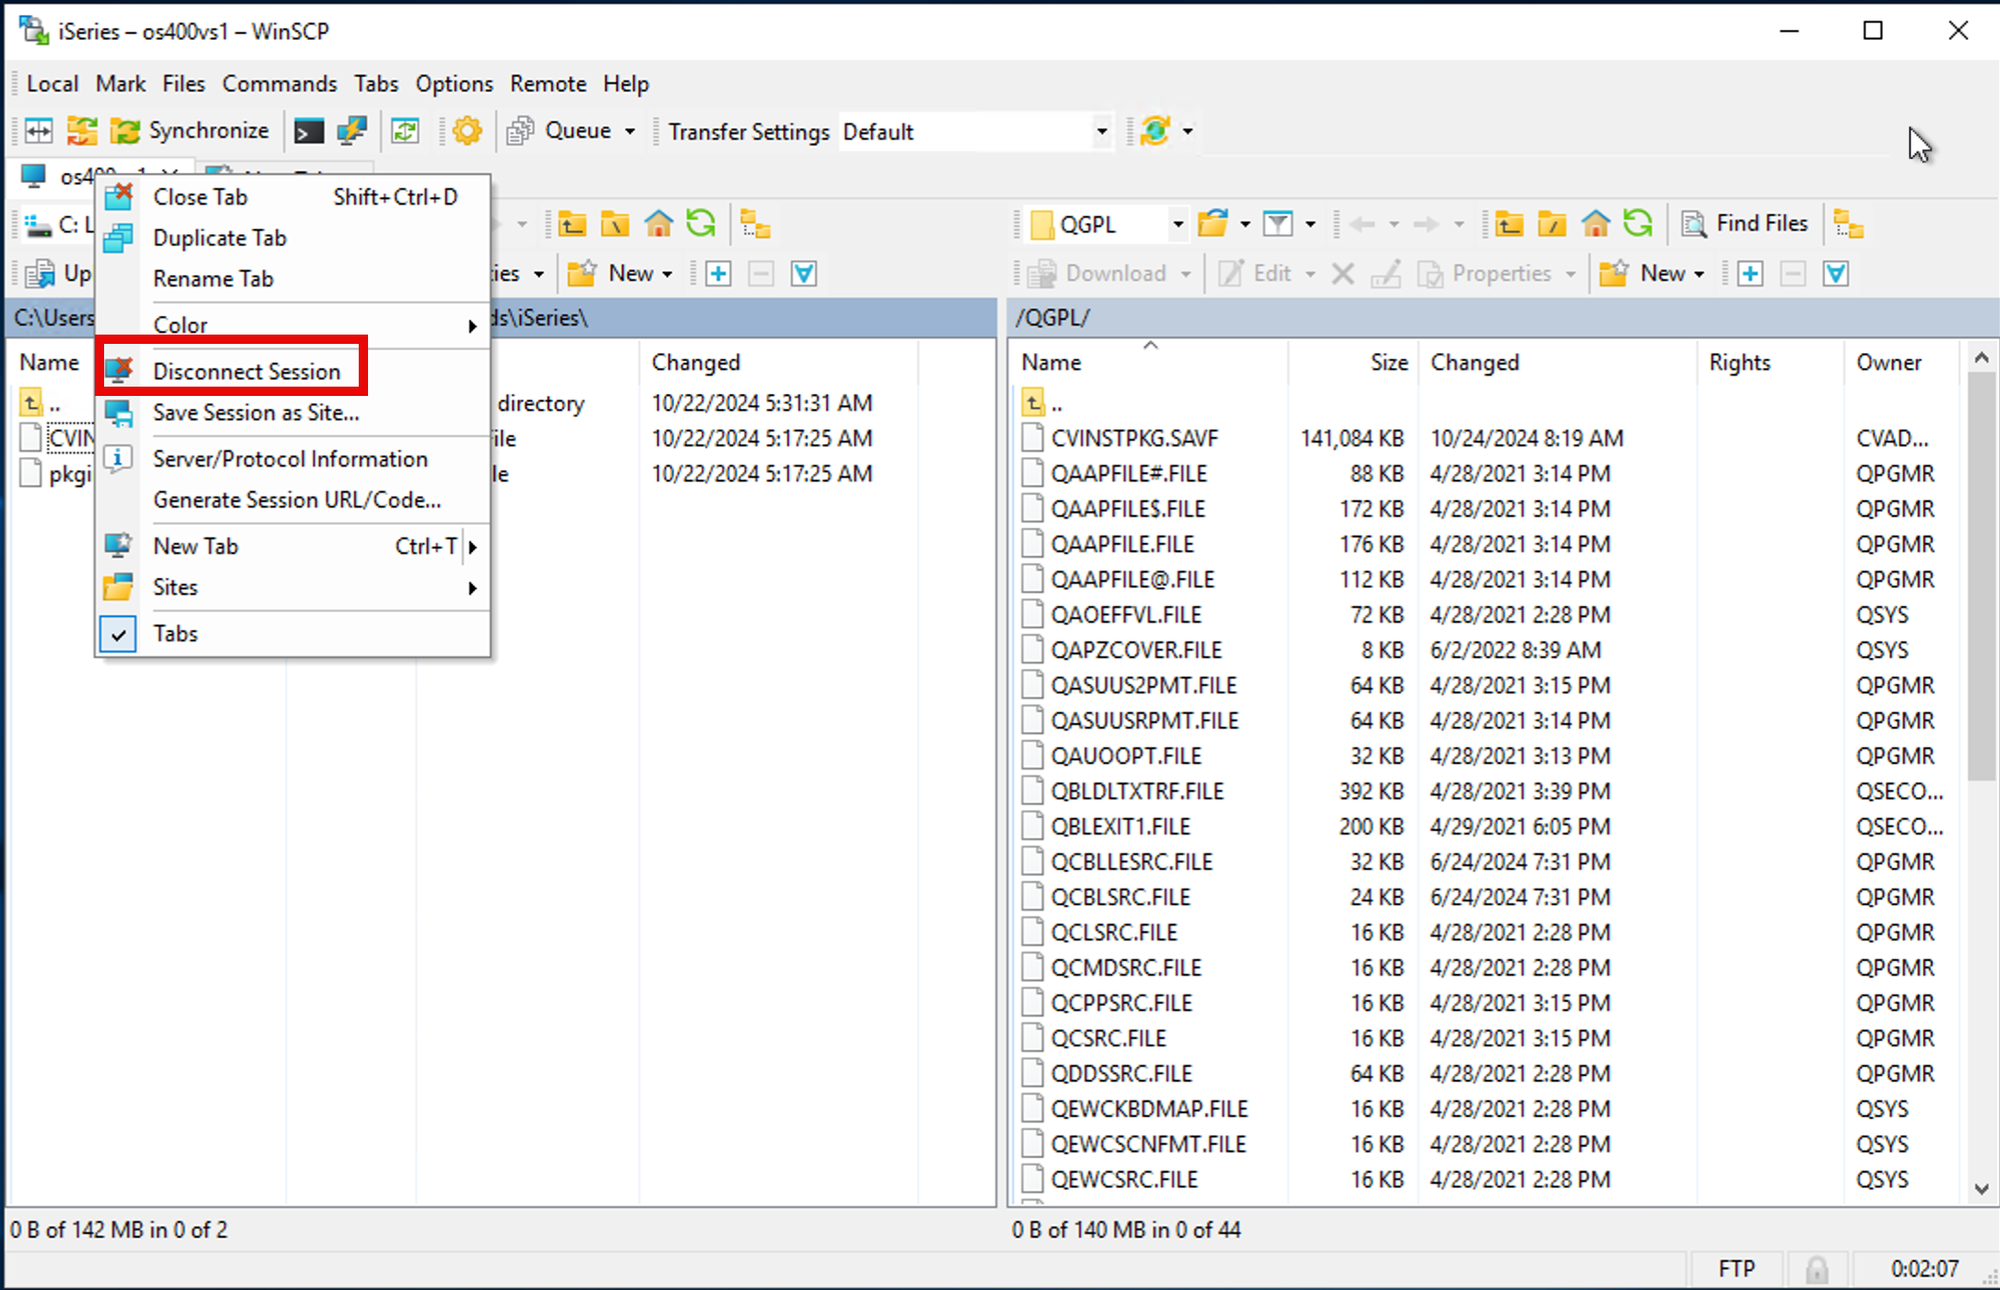
Disconnect from server.
Step 22
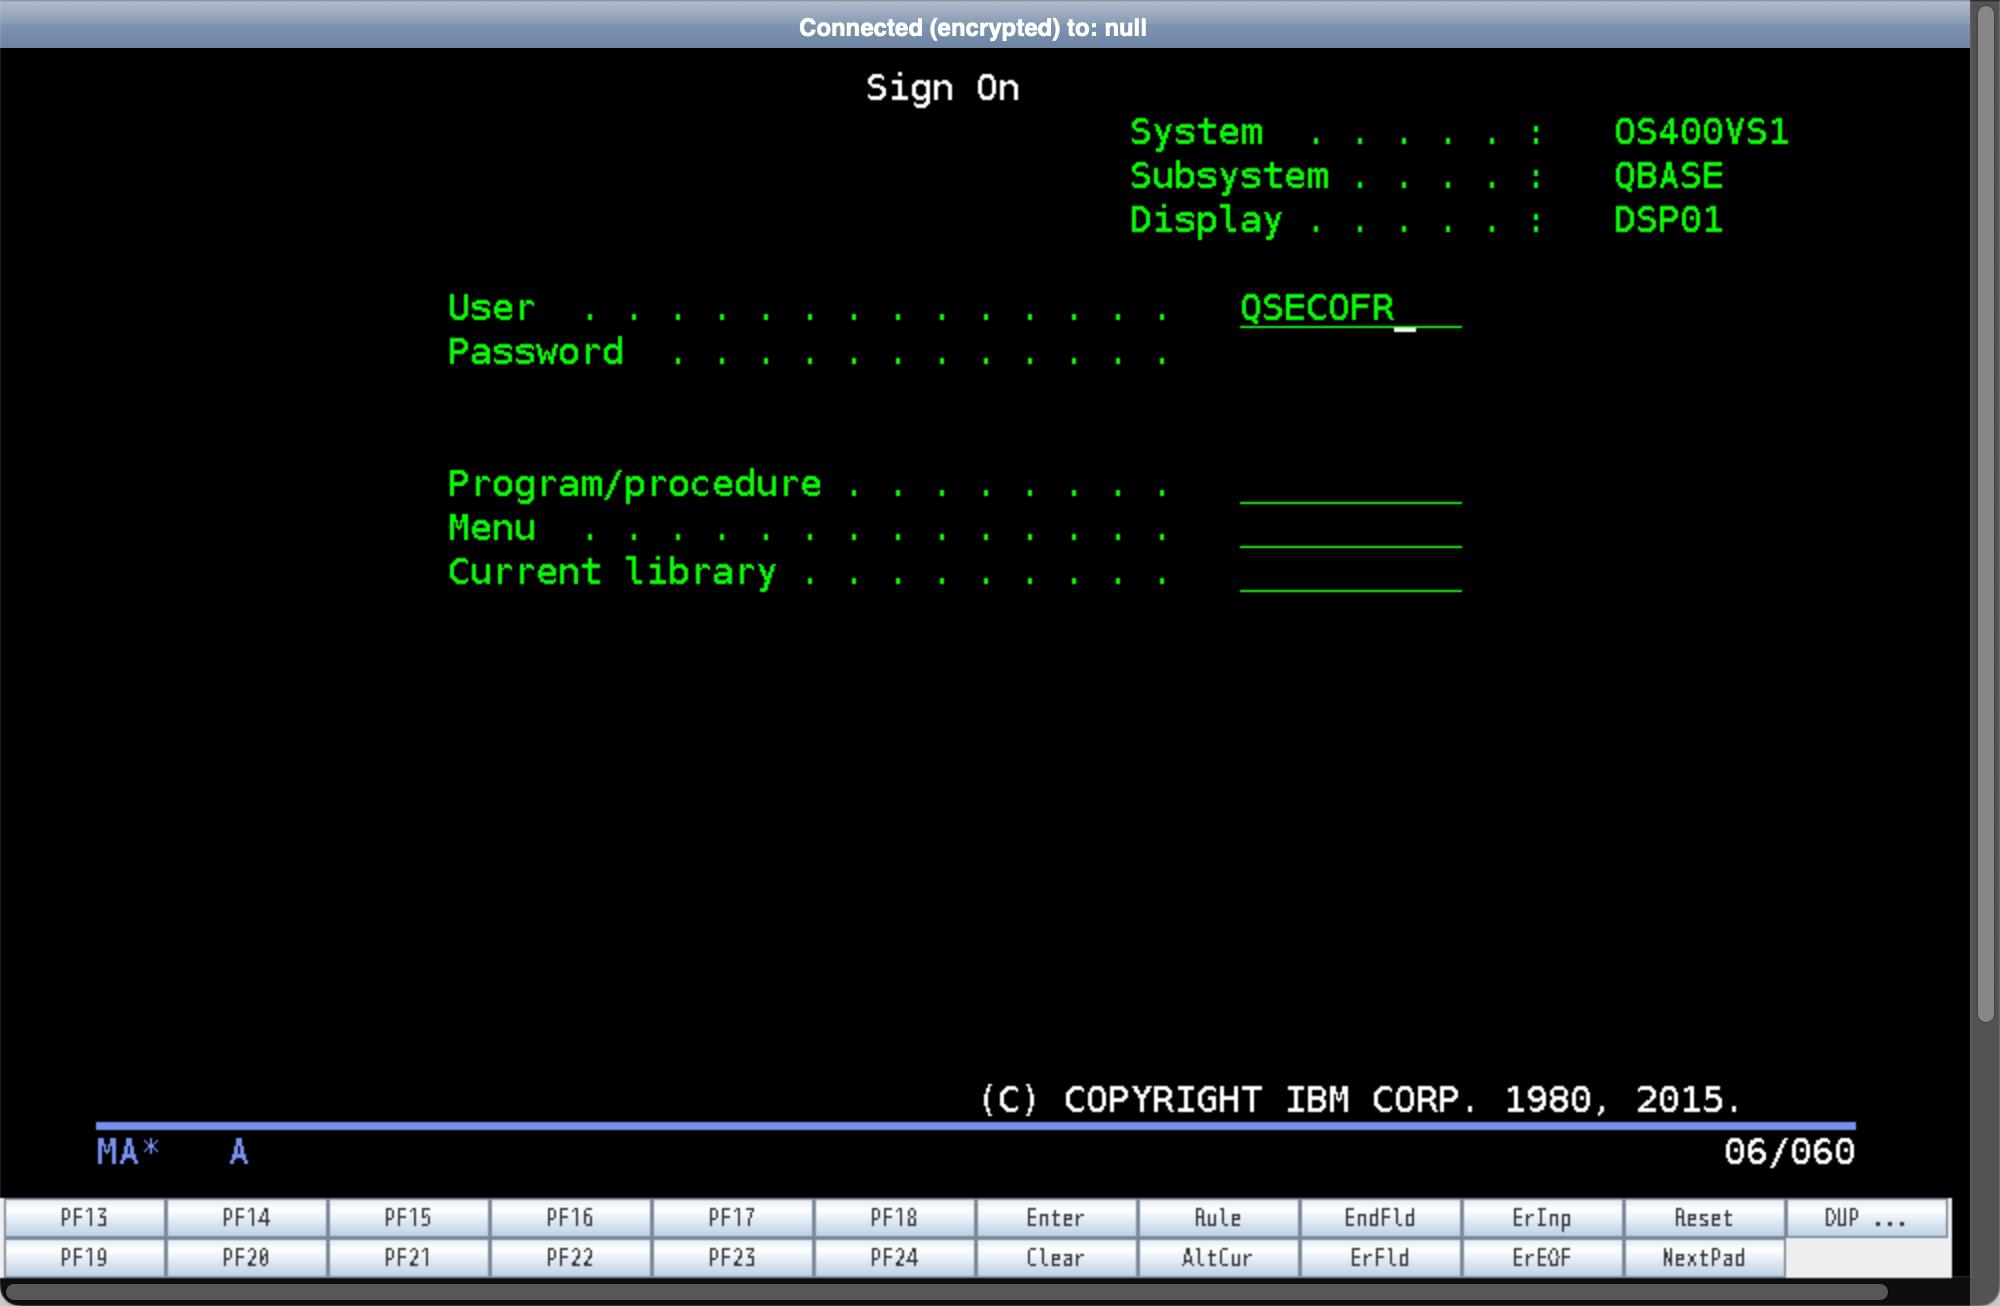
Logon to the IBM i server as QSECOFR.
Step 23
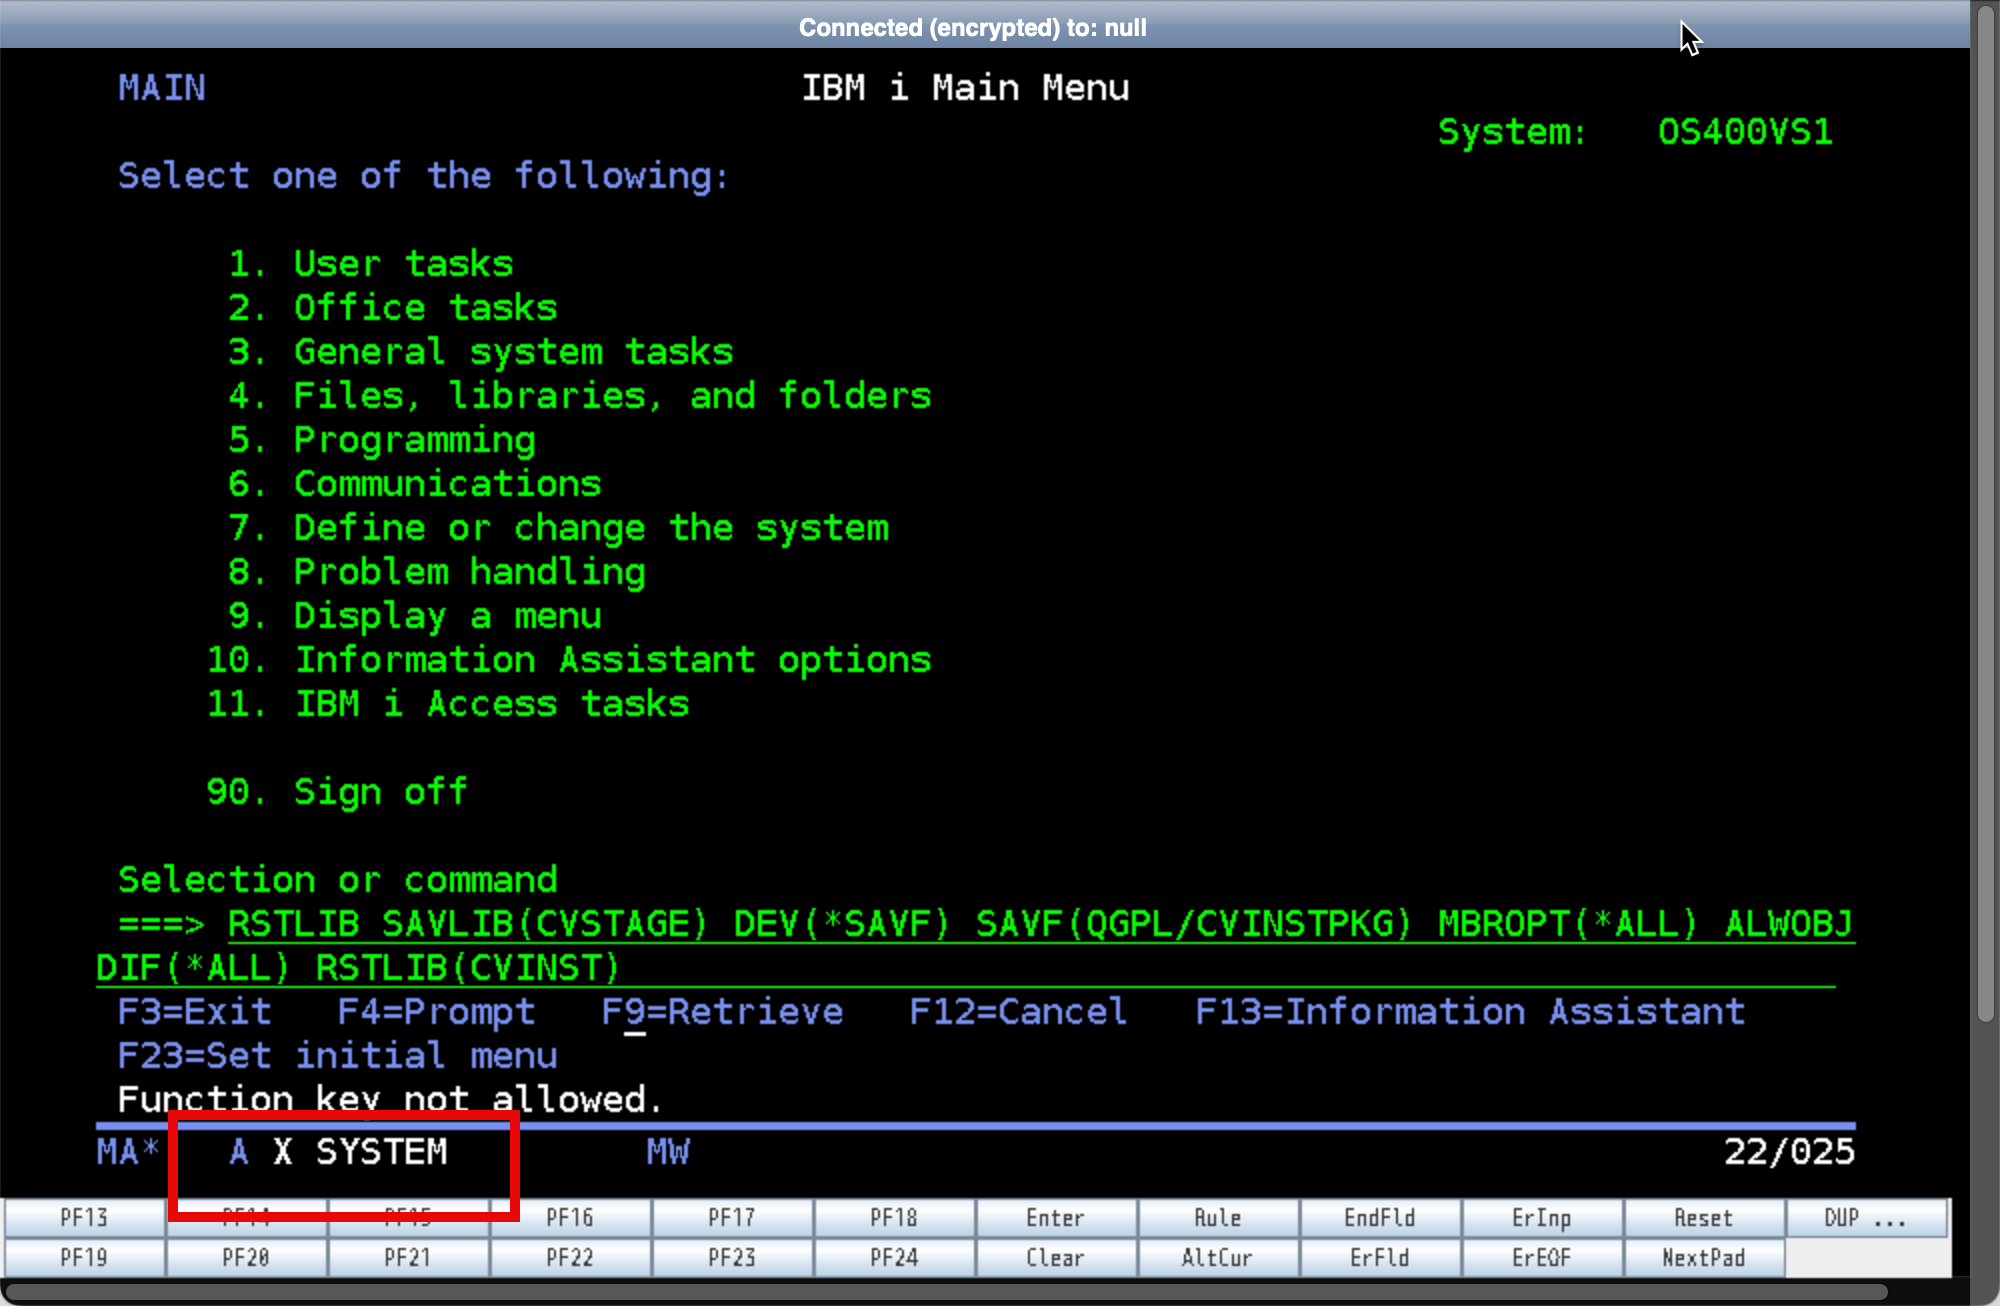
Restore the installation library stored in the .savf save file.
On the command line, type the following,
RSTLIB SAVLIB(CVSTAGE) DEV(*SAVF) SAVF(QGPL/CVINSTPKG) MBROPT(*ALL) ALWOBJDIF(*ALL) RSTLIB(CVINST)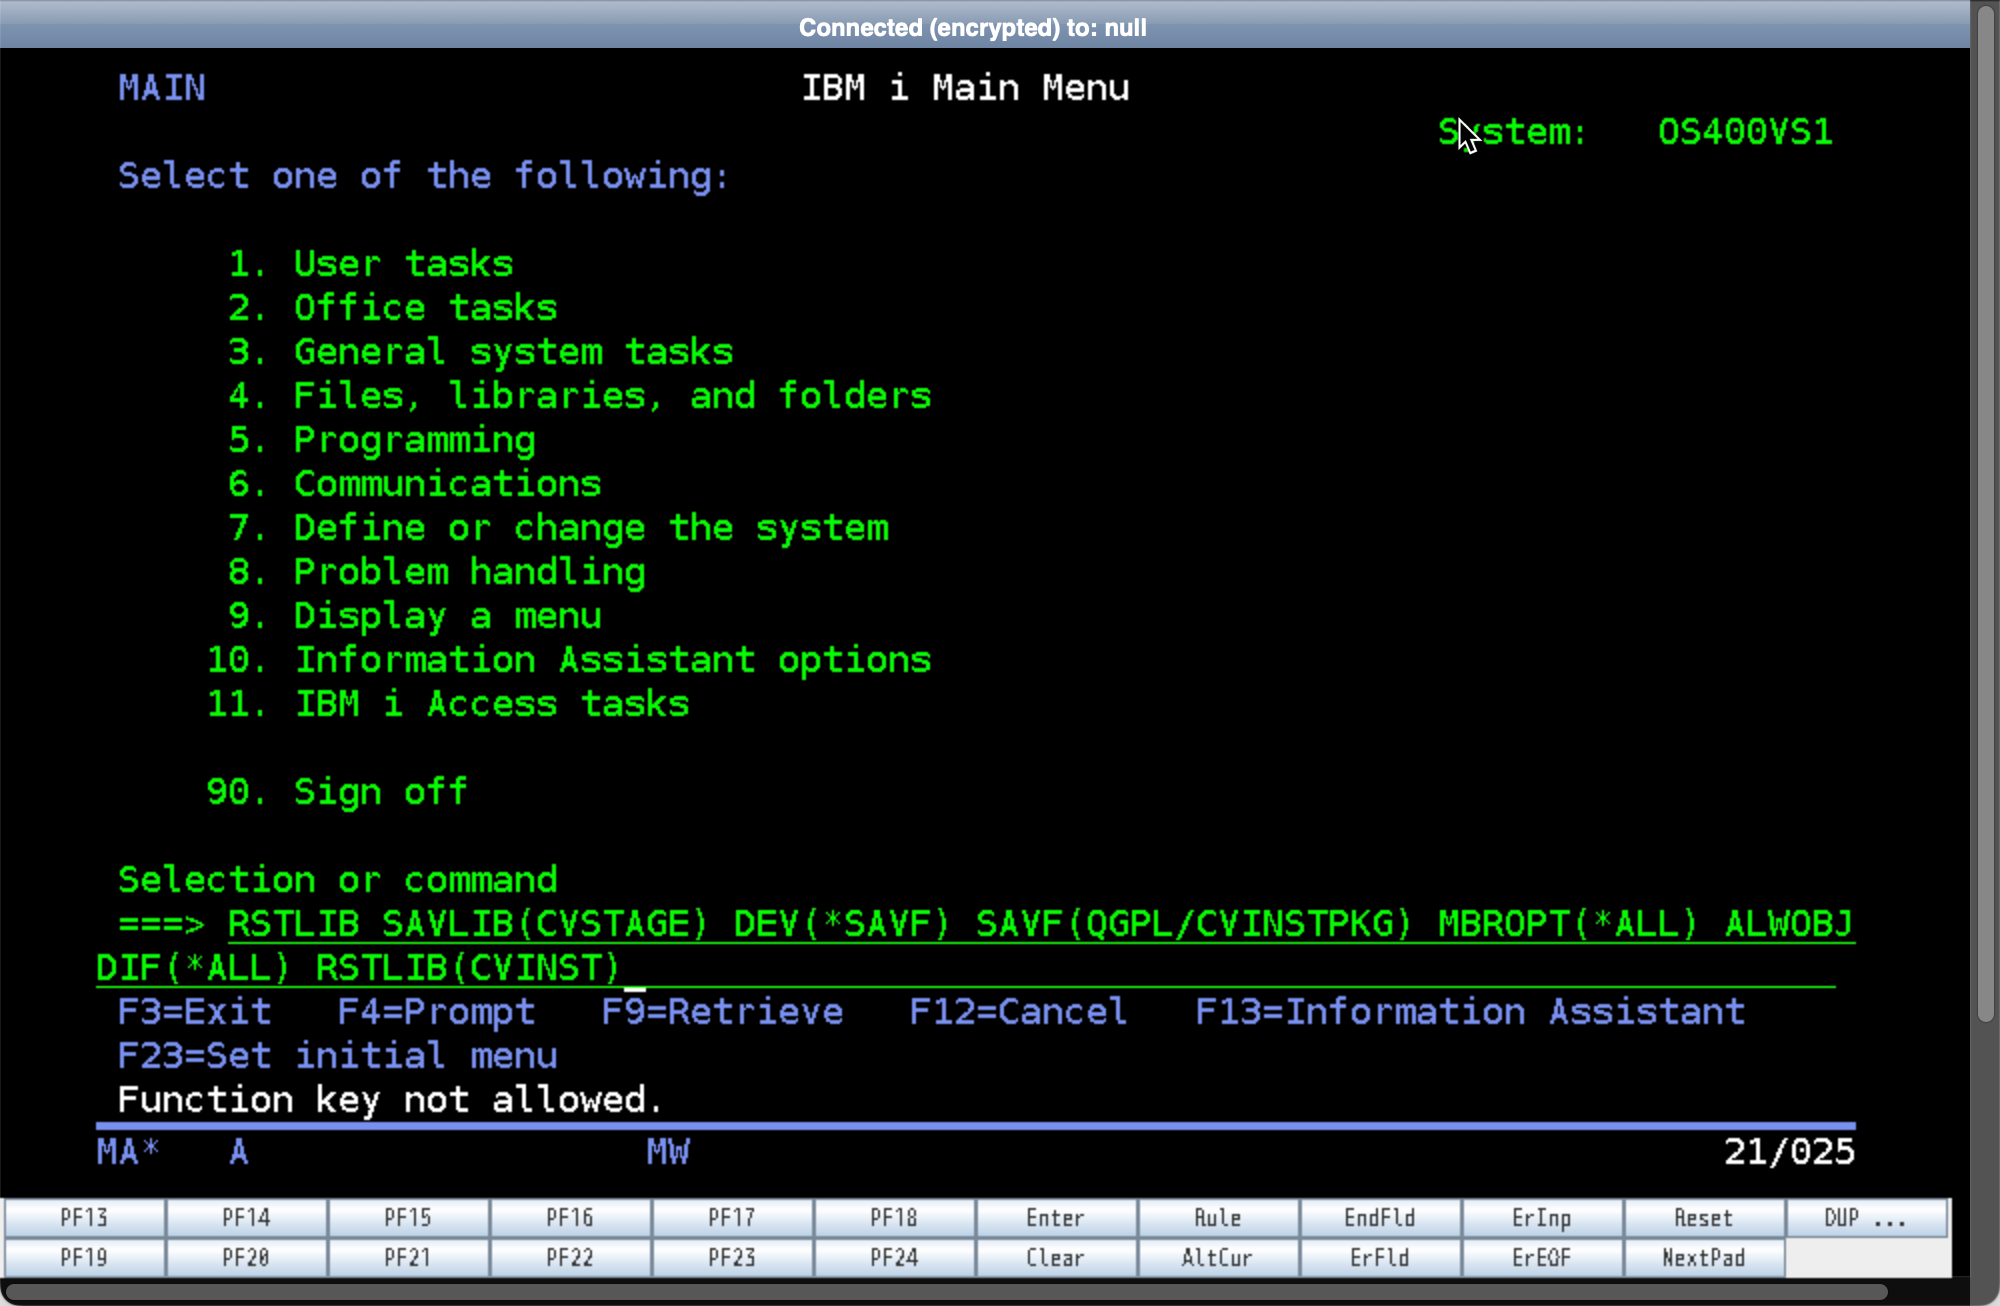
Step 24
Hit Enter and wait for the command to complete.
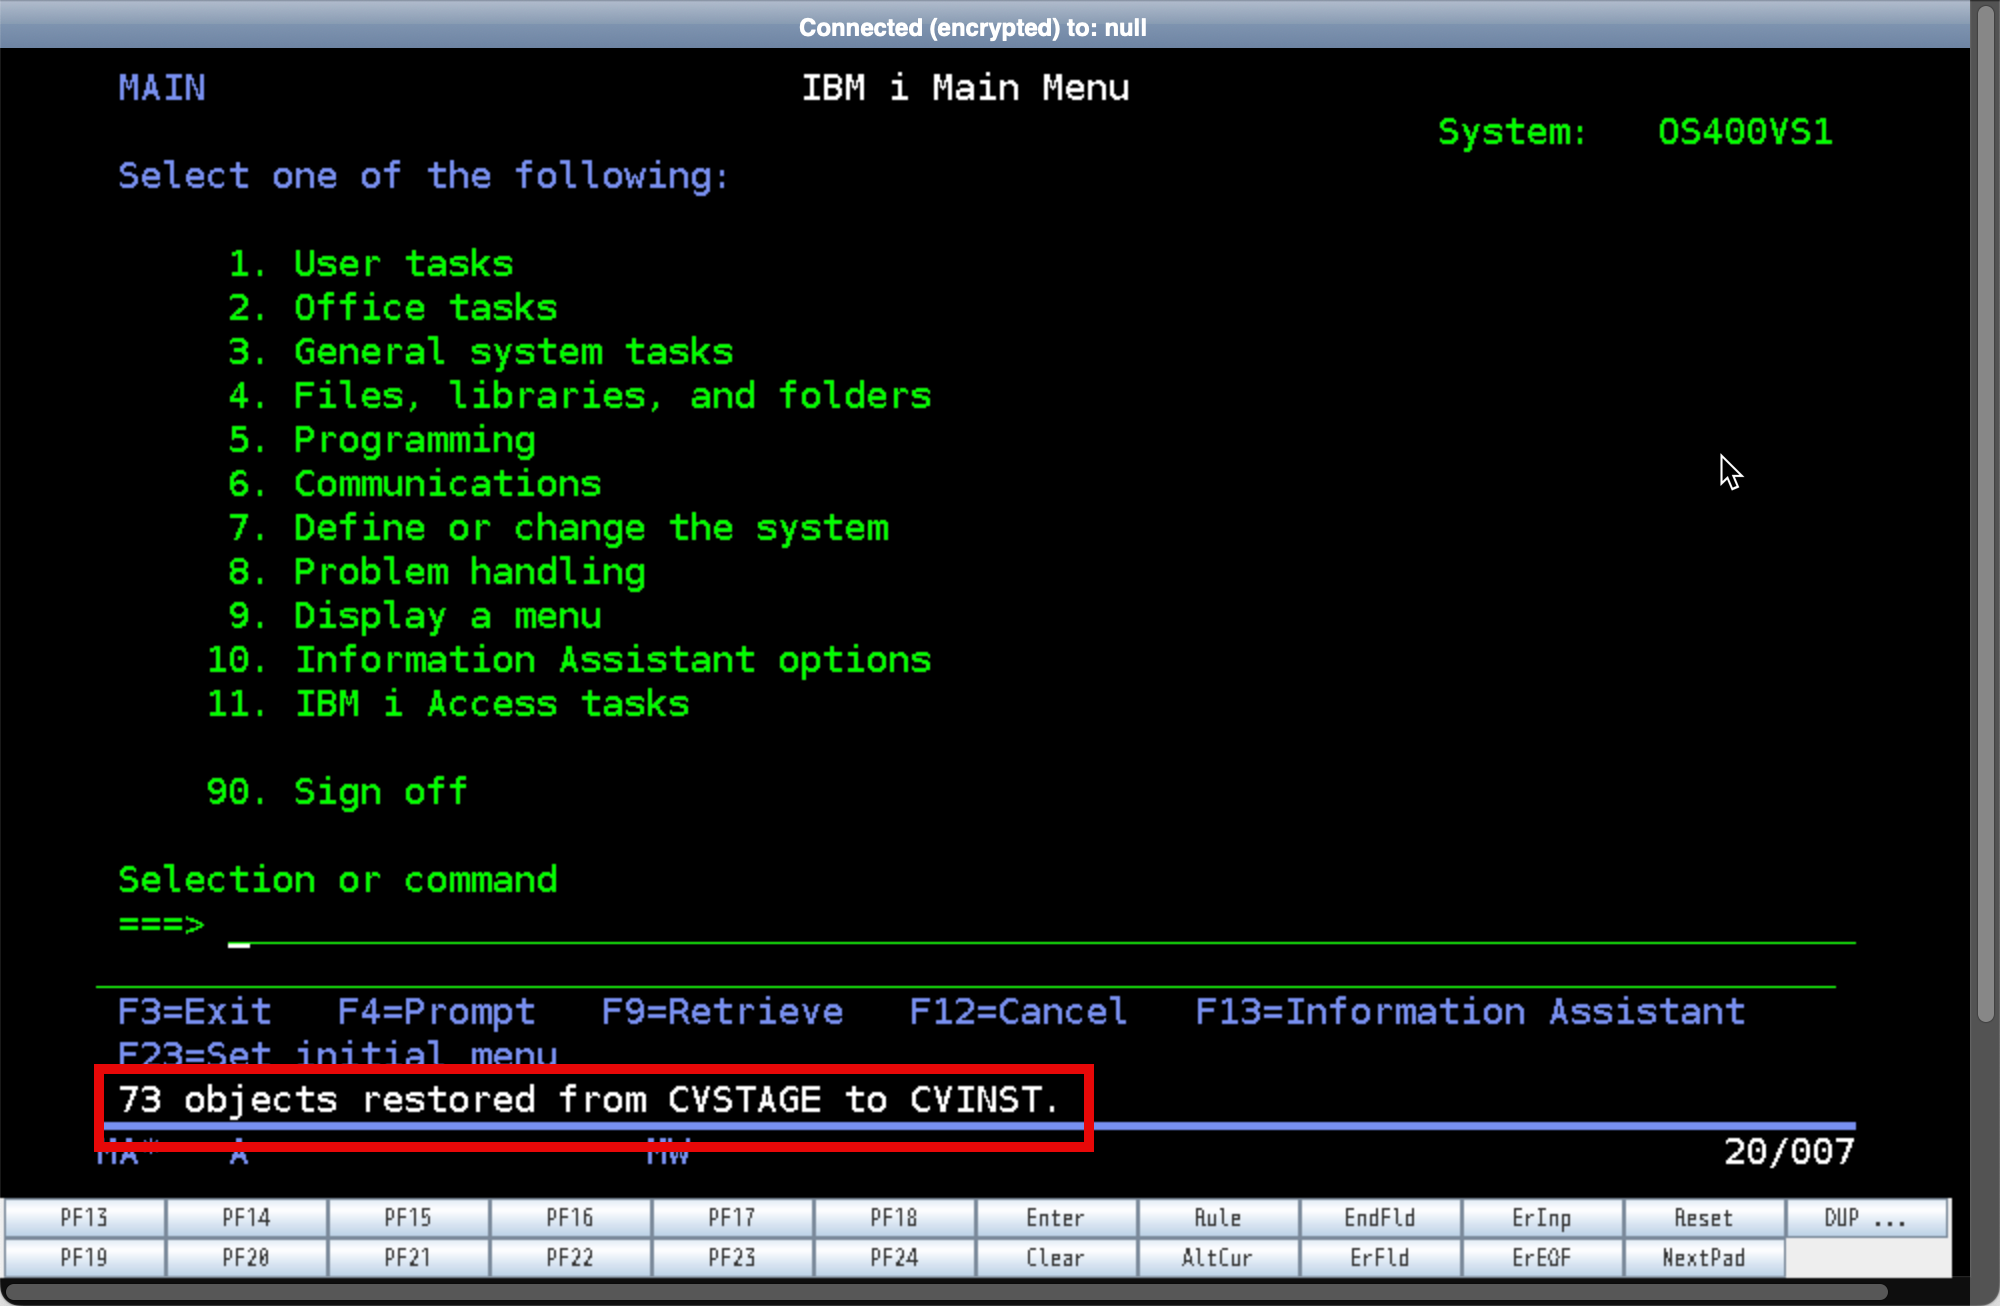
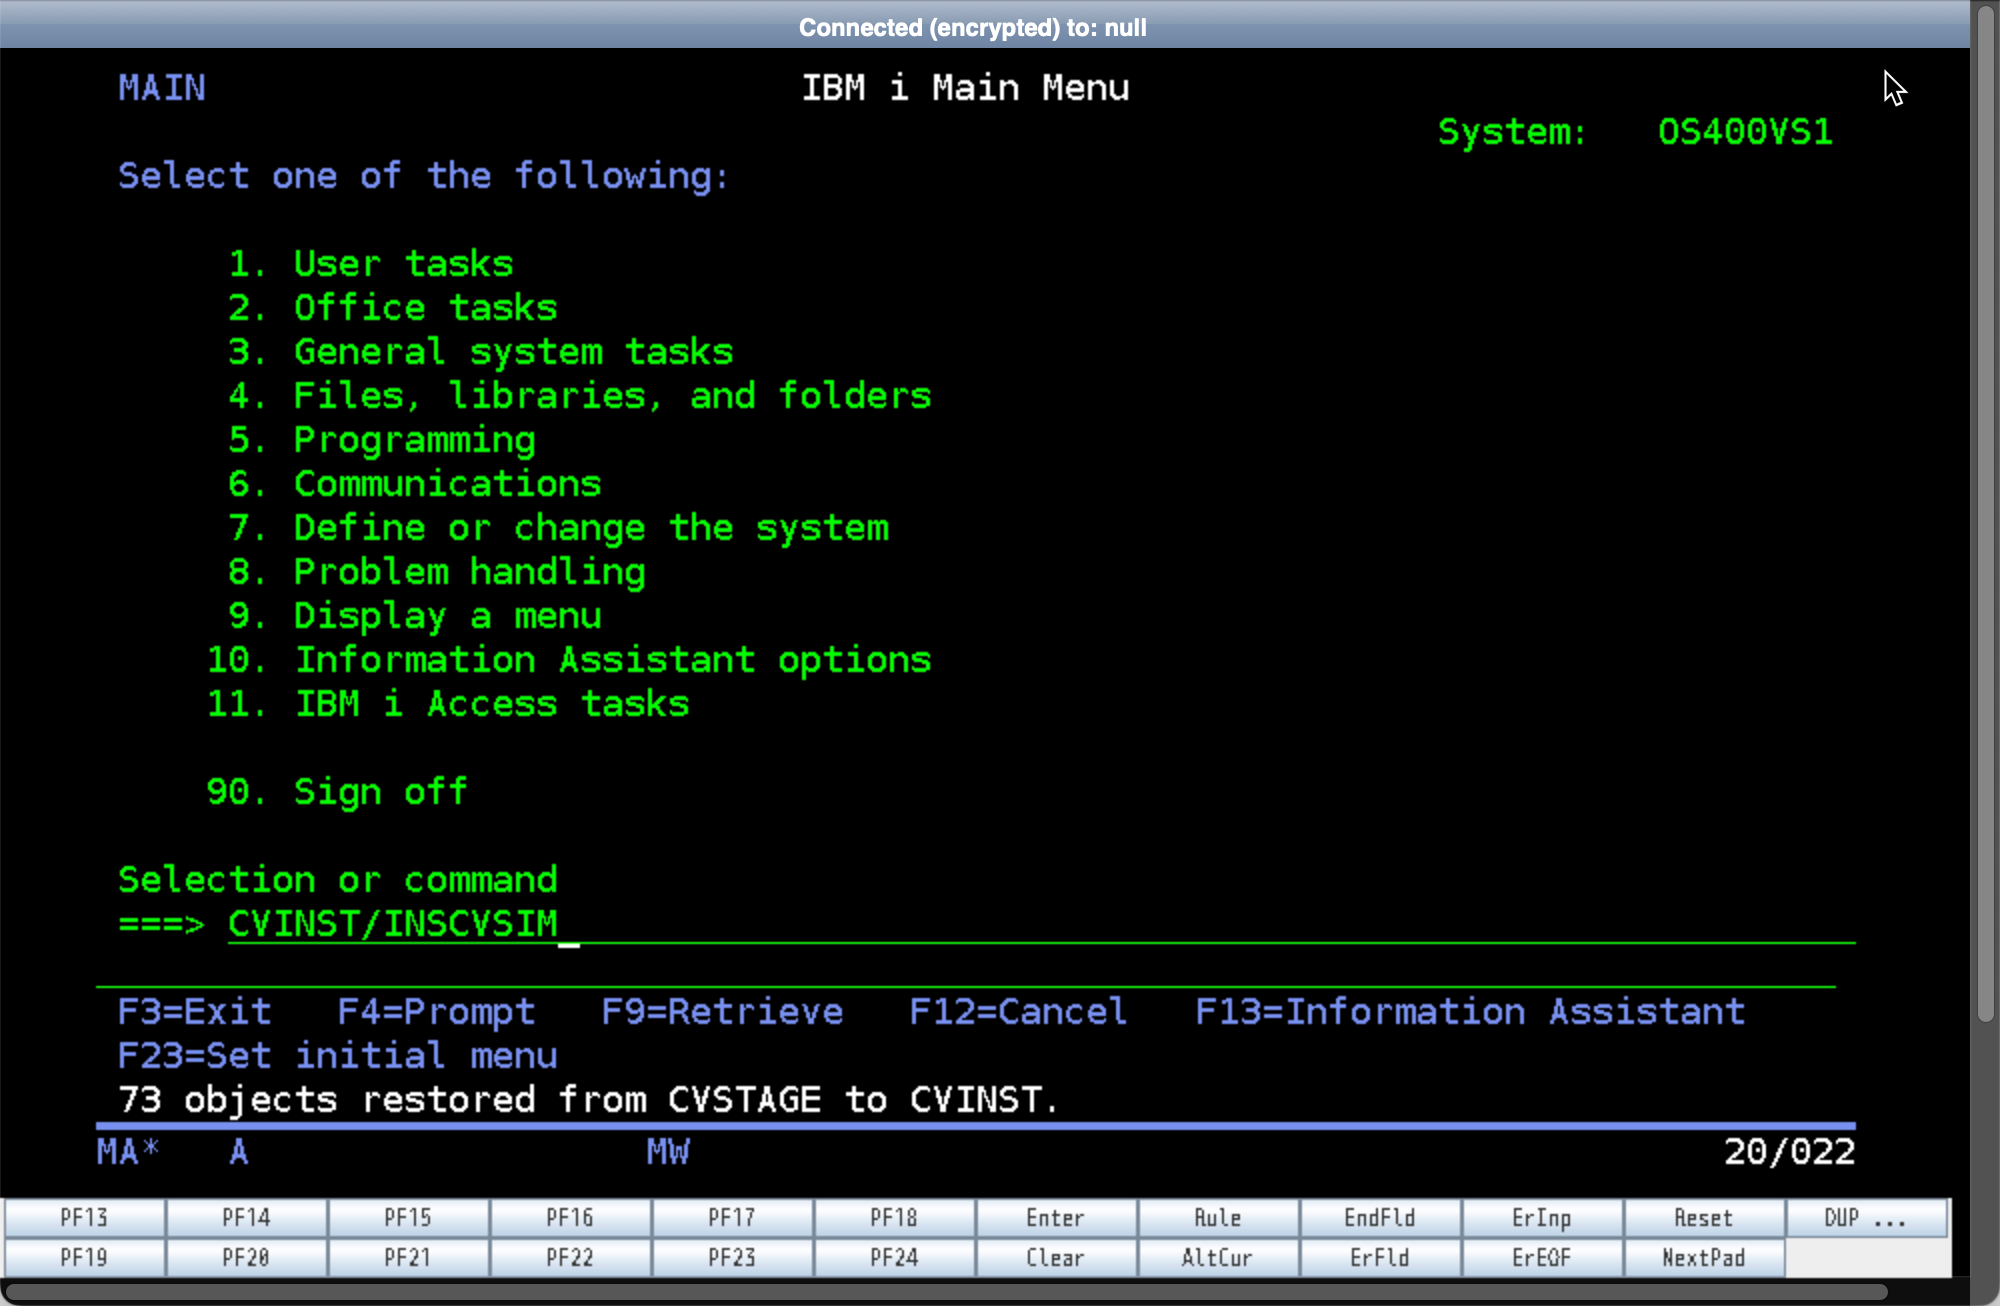
Step 25
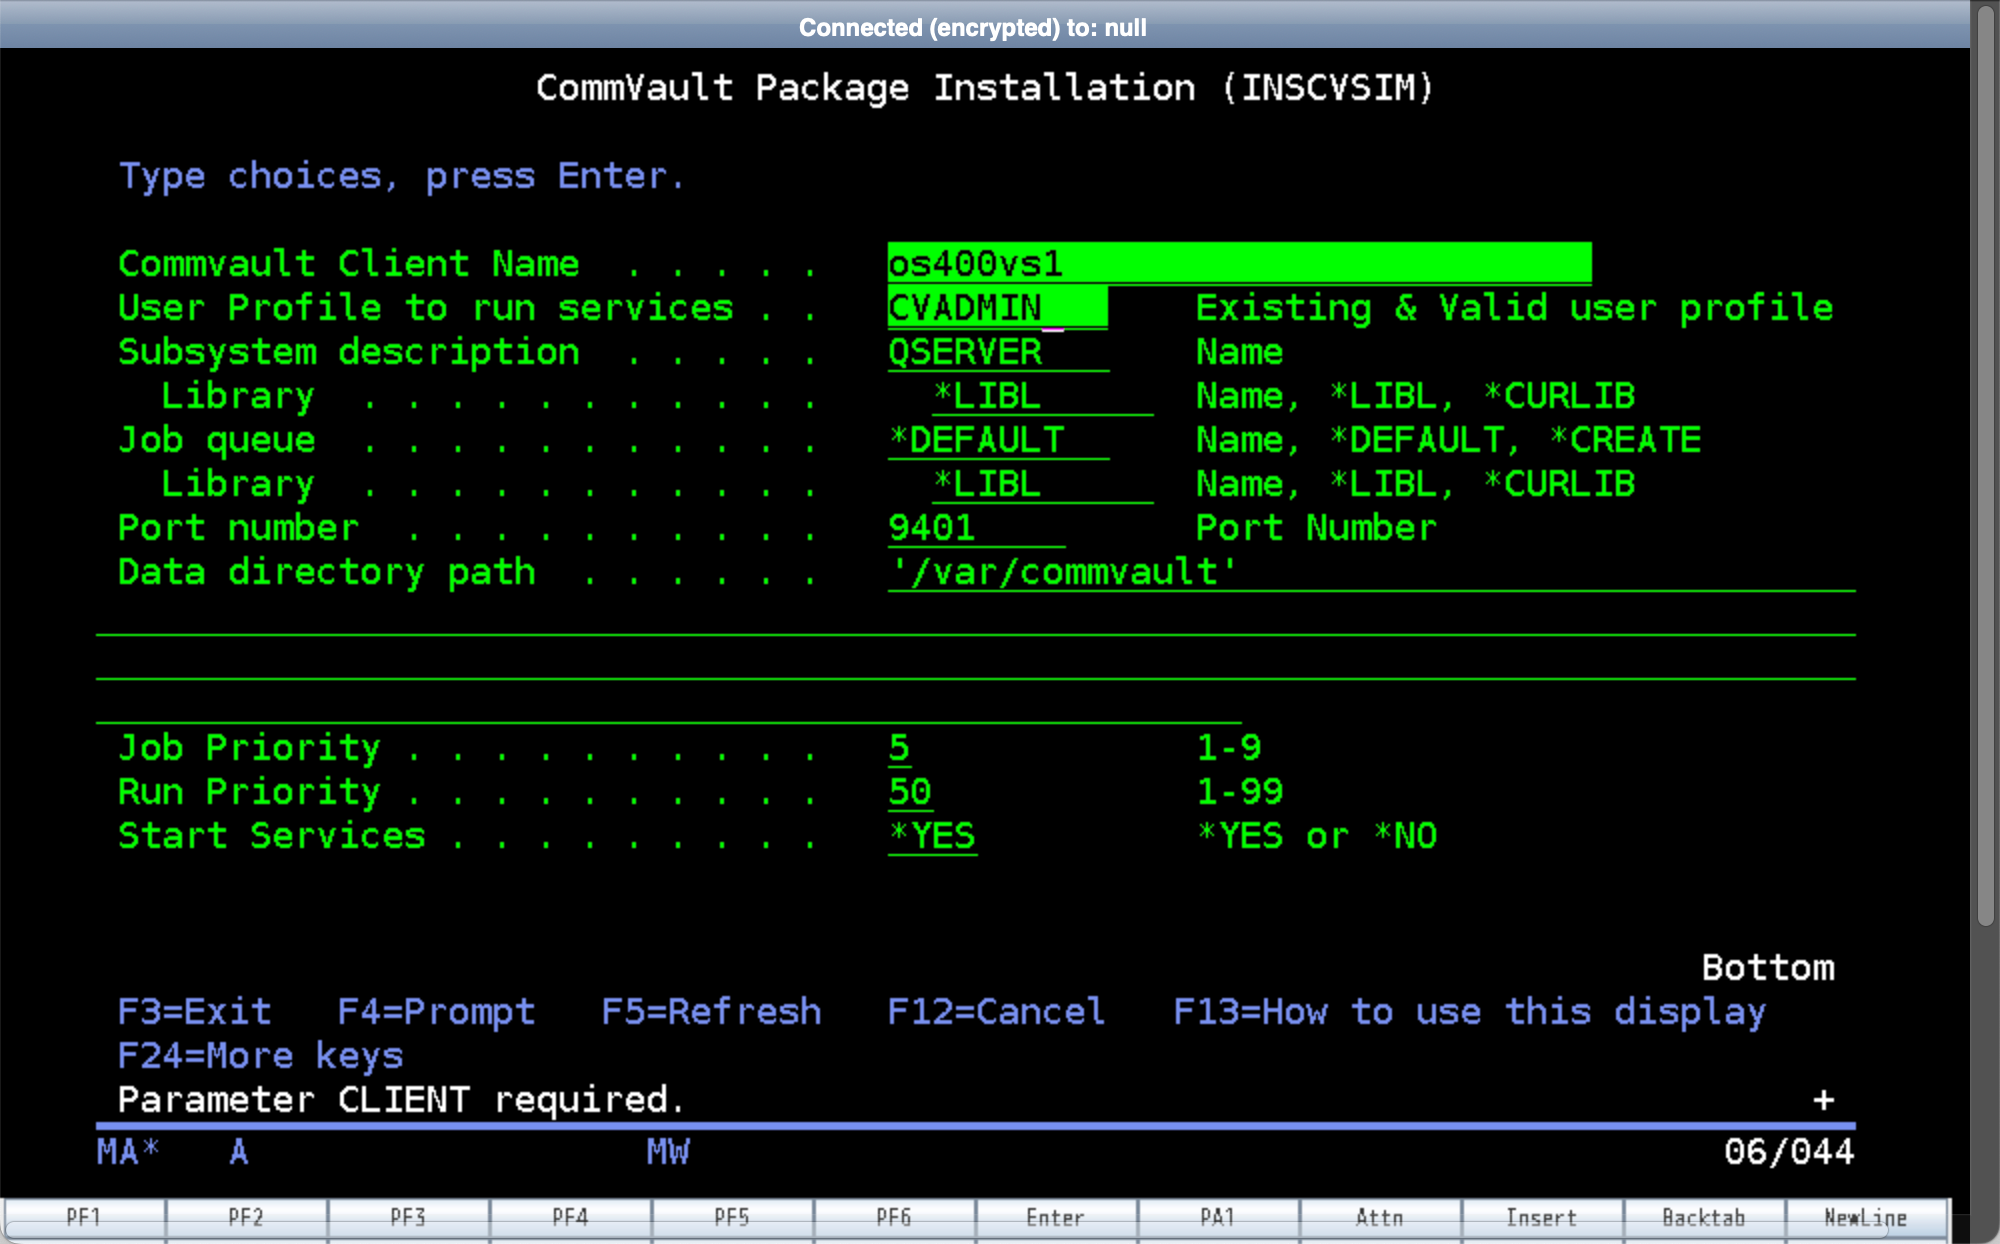
Run the CVINST/INSCVSIM command,
Step 26
Go to the Windows Commvault Server.
Open the Commvault Commcell Console.
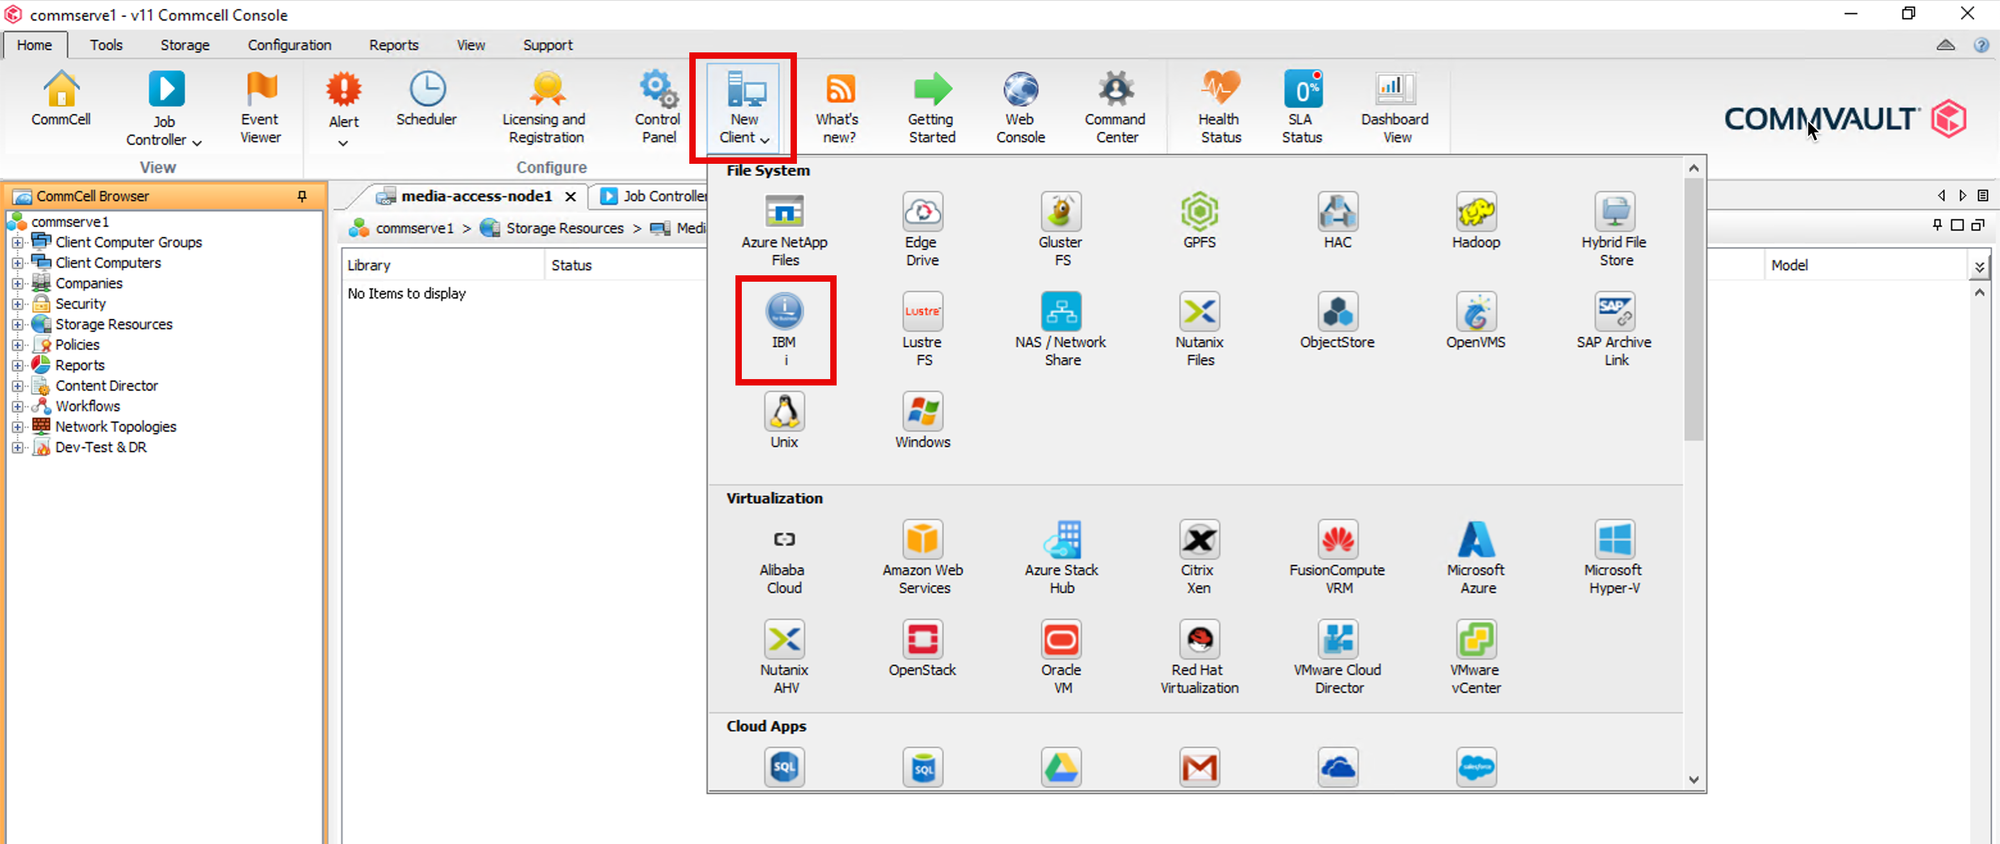
Step 27
Click New Client to Create an IBM i File System Agent Client.
Step 28
On the New iSeries Client Configuration Dialog box, enter the IBMi server details.
Enter the IBMi Commvault Service account.
Click Use Proxy Client.

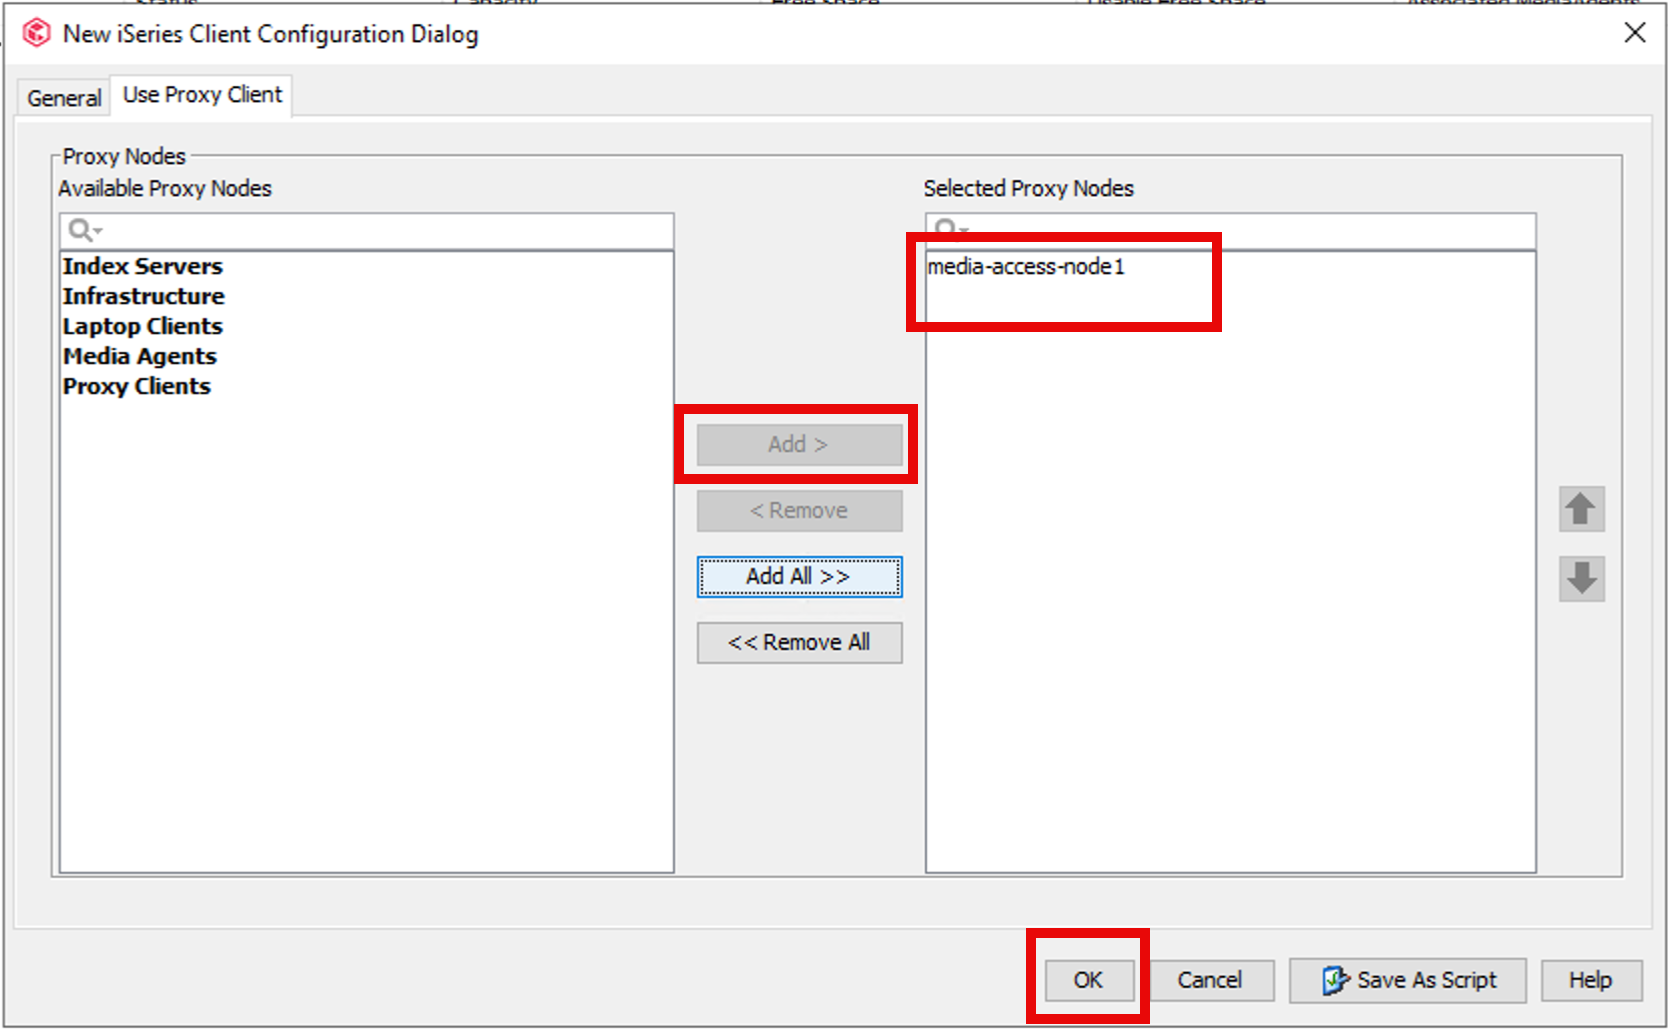
Step 29
On the Use Proxy Client dialog box, select and add the configured Linux server.
Click OK.
Step 30
Back on the IBMi Server, at the CVINST form, fill in the client name matching the Commvault IBMi client configured in Step 26.
Hit Enter.
The installation command will perform the following tasks,
* Creates CVLIB and CVLIBOBJ program libraries when it does not exist
* Copies the required files in the the CVLIB program library
* Creates the class object, job description and if the job queue is specified, the job queue will be created
* Copies the configuration files to the /var/commvault directory
* Prepares the data directory
* Changes the subsystem description by adding the new routing entry and attaches the job queue, if specified, to create the job queue
* Starts the Commvault services in the specified subsystem
* Sets the ownership for library, directories and files
Step 31
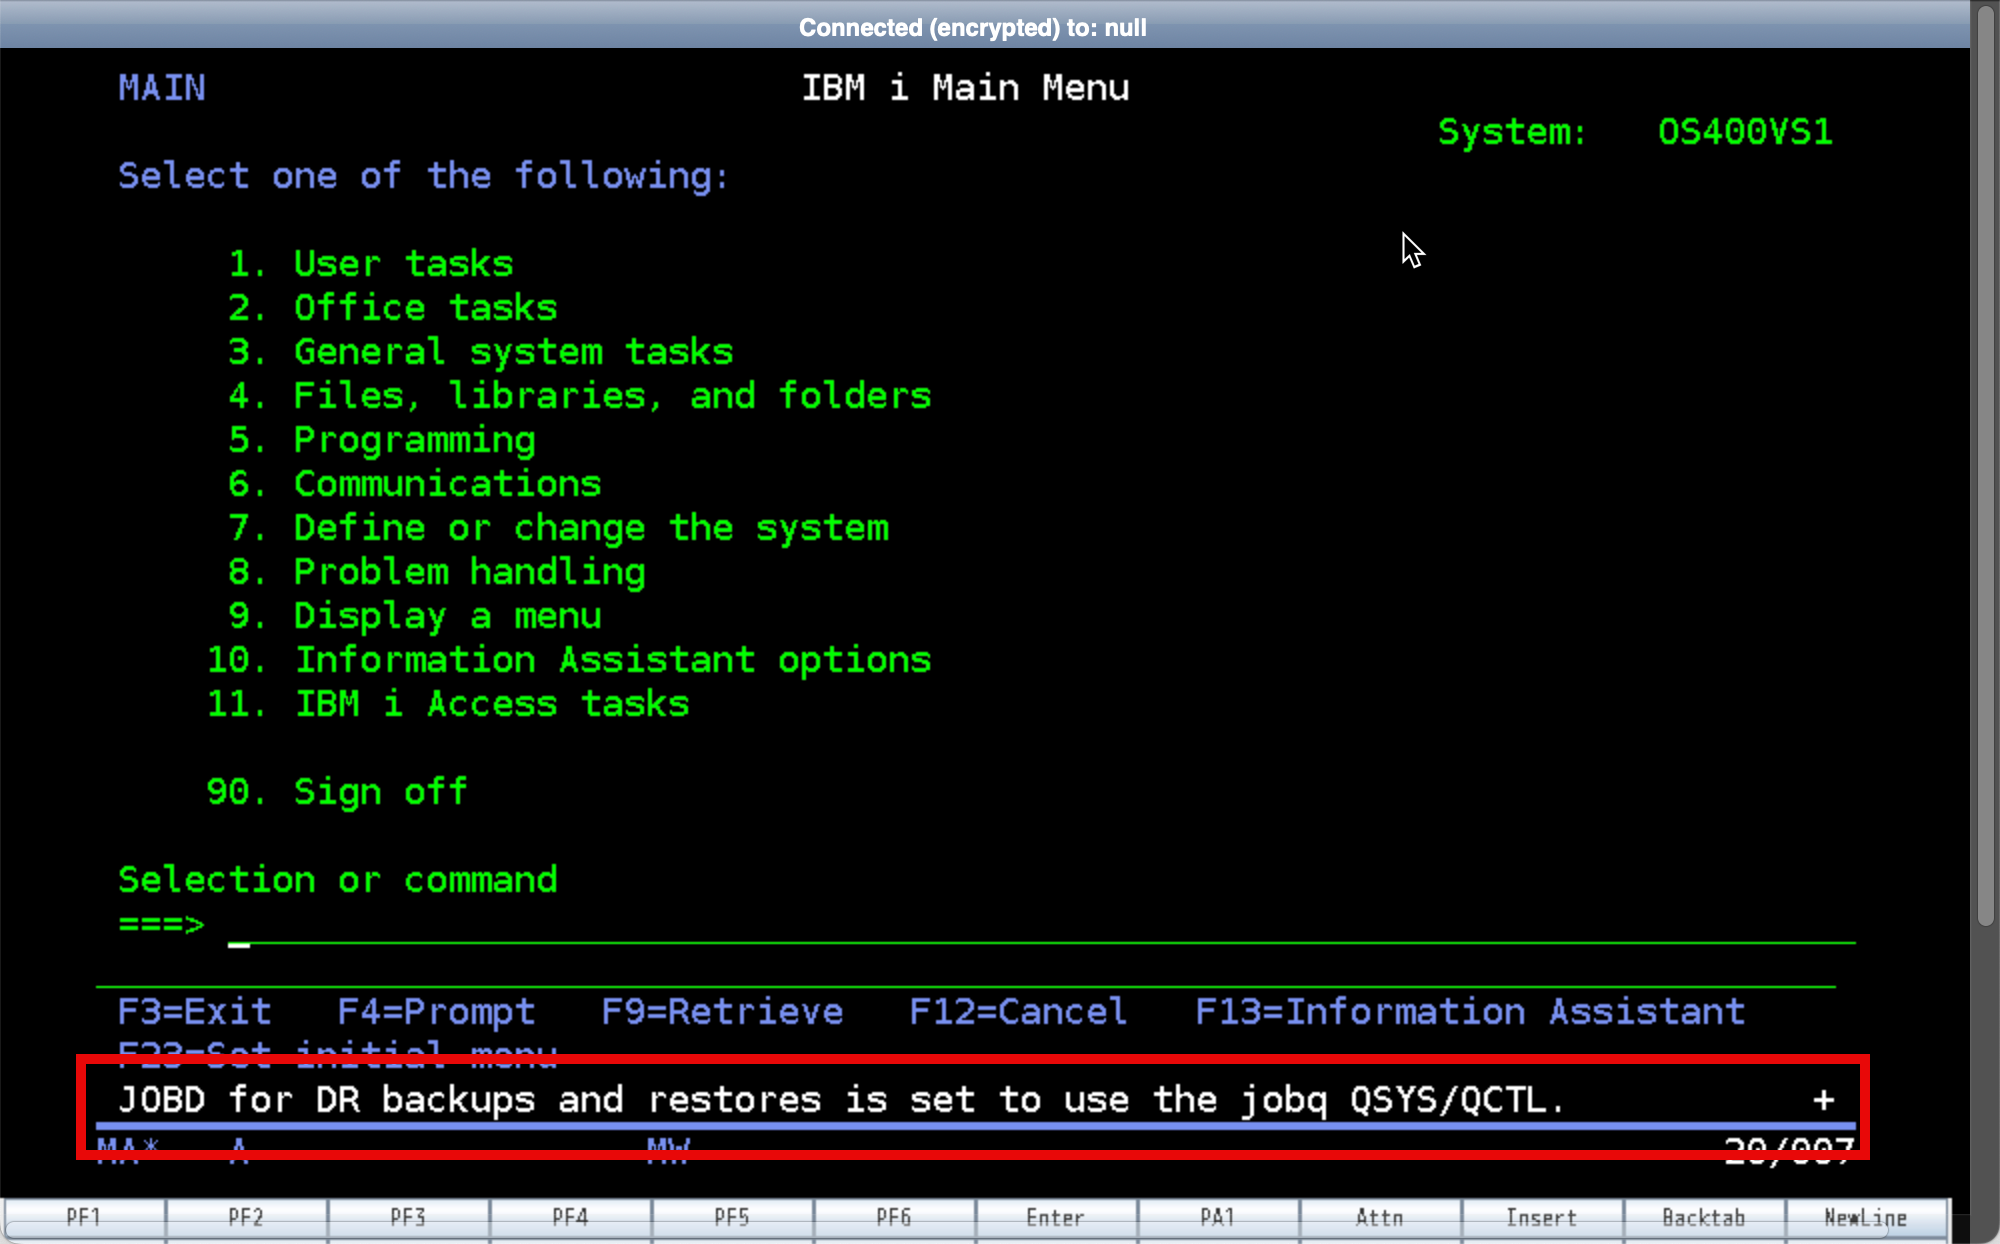
IBMi Commvault client installation complete.
Step 32
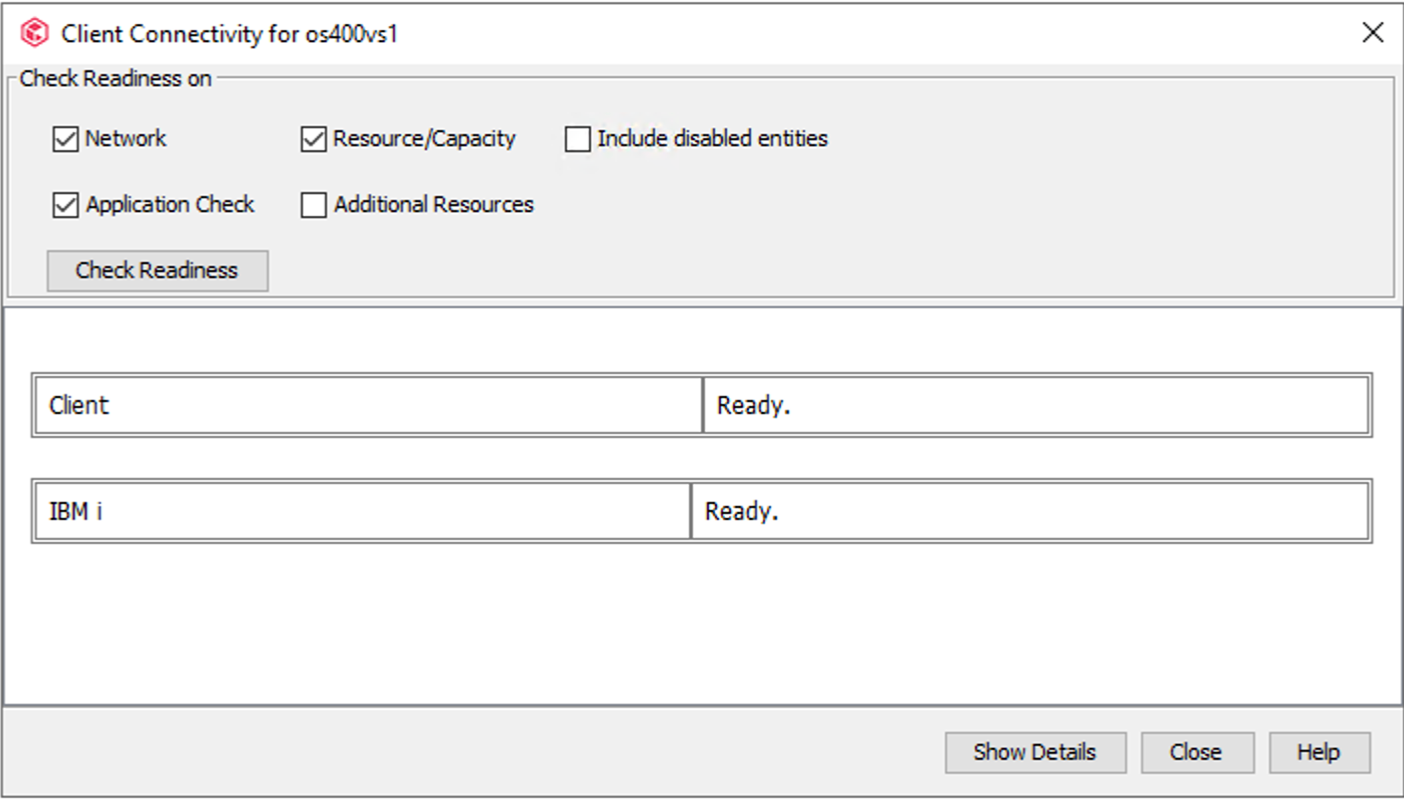
Back on the Windows Commvault Server, run the Check Readiness command.
Ready status shows successful connectivity.
Show Details output
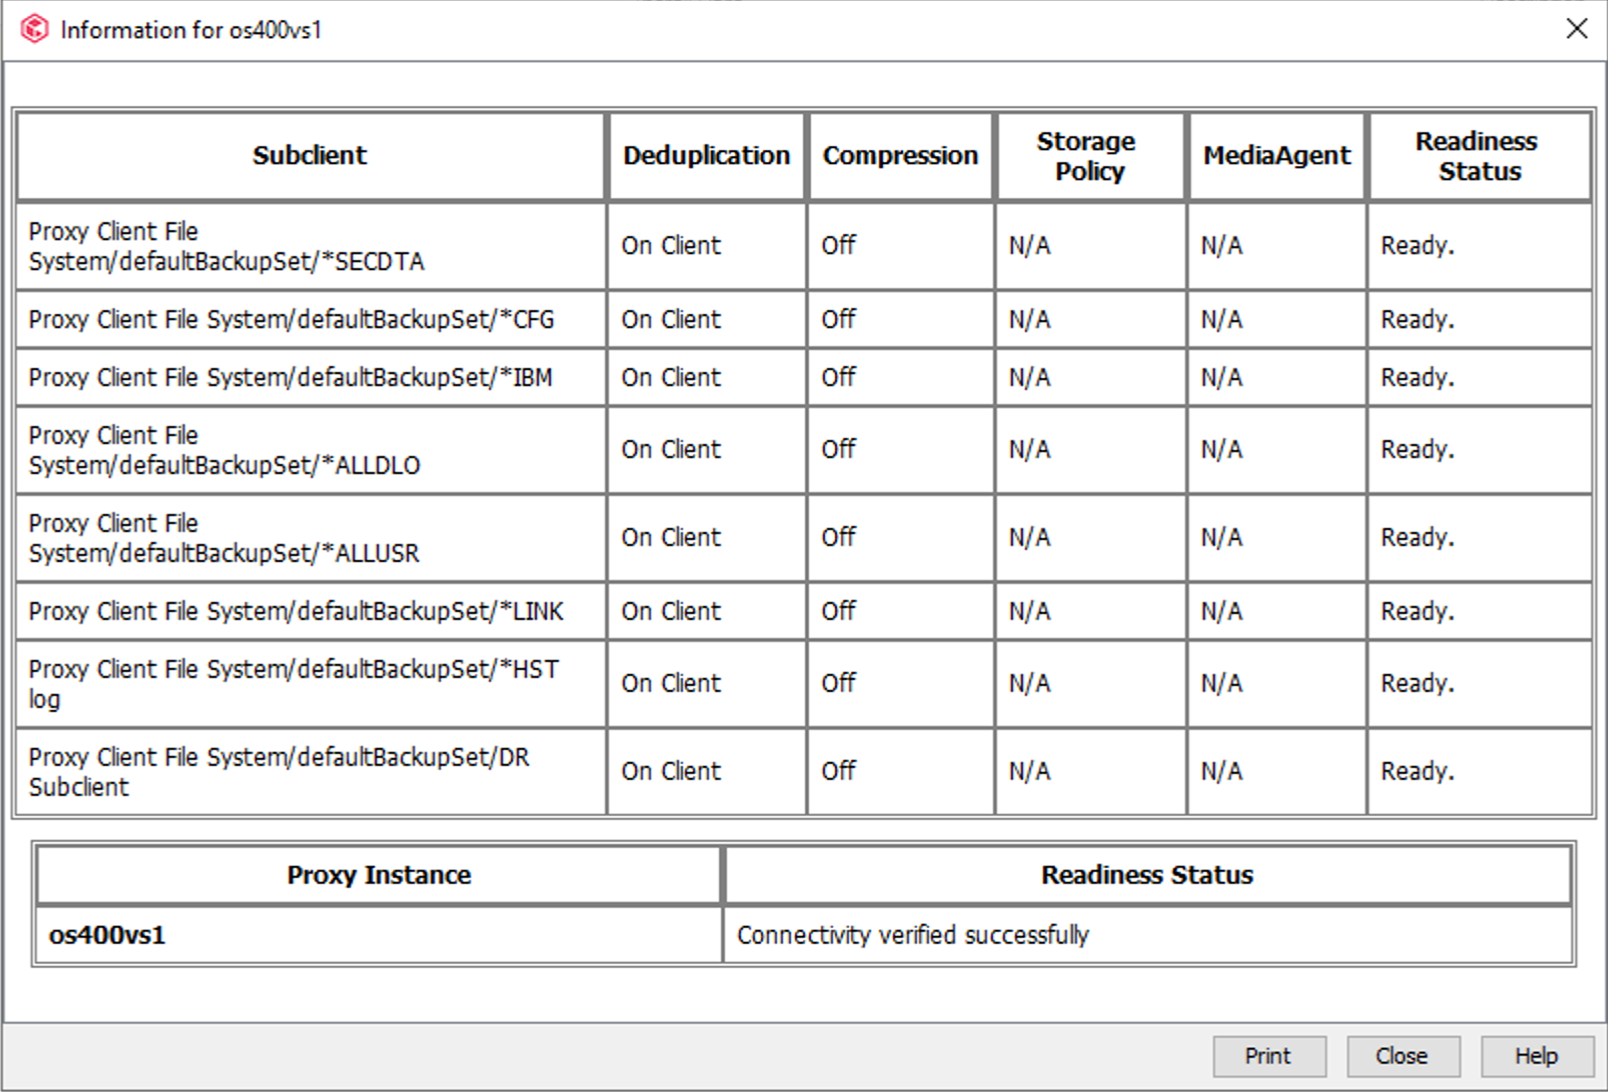
All IBMi subclients will be automatically configured.
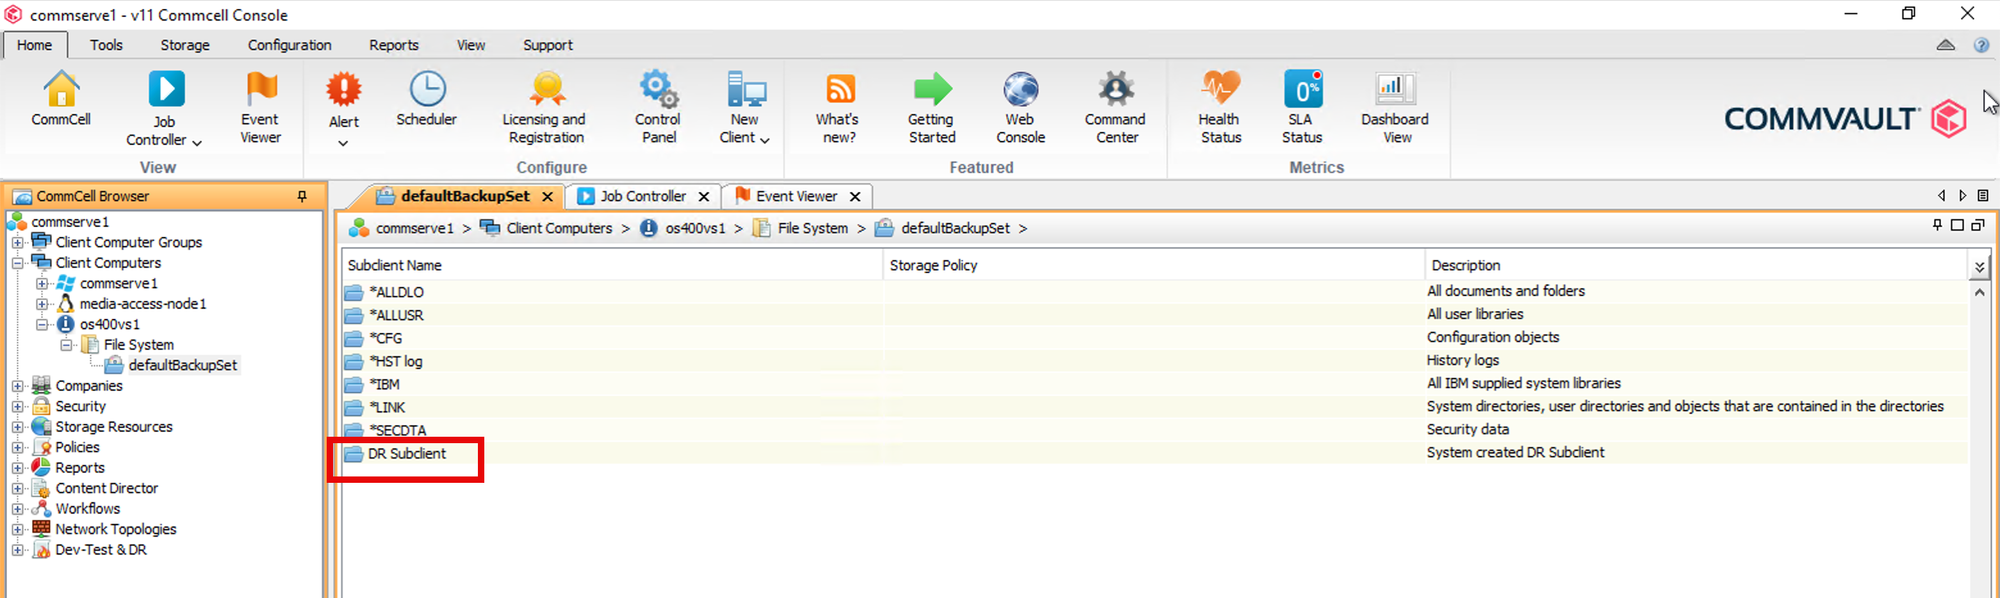
The 1-Touch IBMi Bare Metal subclient will be automatically configured.
The above subclients can all be configured to be scheduled to run at regular intervals.
Great Job!
References,


