Back to basics... Get your Commvault Server up and running.

If you are curious how Commvault Cloud software is installed, then you are at the right place. I will try and list out all of the installation screenshots in case you would like to follow along.
As part of my job, I do need to build test Commvault environments to test a software functionality to prepare for a customer engagement. Nowadays, it is quite easy to create and run virtual machines on my own laptop for this purpose.
Please note, it is recommended that technical planning, design and server sizing is completed before installing a Commvault server in a production environment.
For my use case, all I need is a running Windows Server 2022 VM which I can run on test mode for 180 days. I also use the current Long Term Support version of 11.32 of the Download Manager. This can be accessed using this link - https://support.commvault.com.
Let's begin.
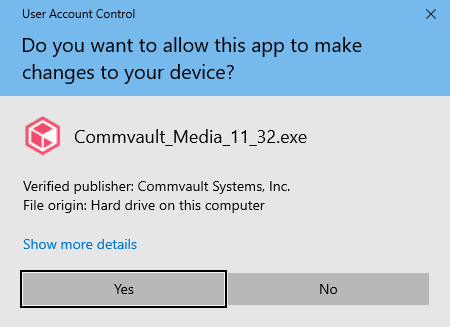
- Double-click the Commvault_Media_11_32 executable file.

- On the User Account Control prompt, click Yes.
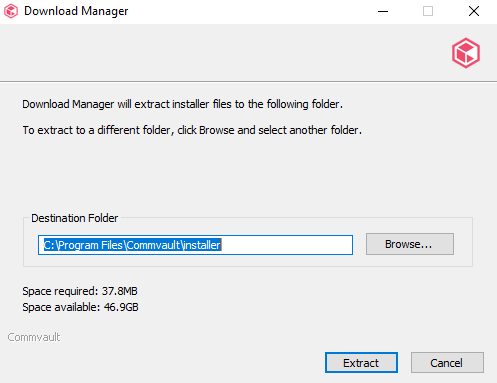
- Confirm the Destination Folder then click Extract.
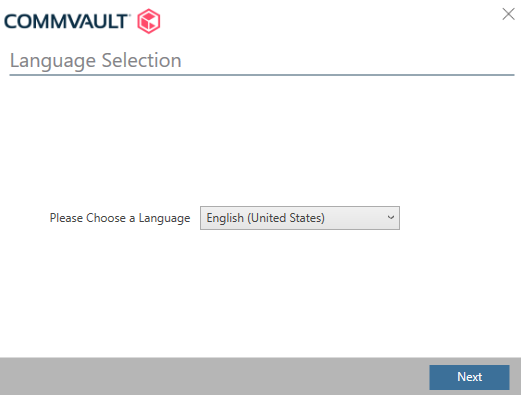
- Confirm the Language then click Next.
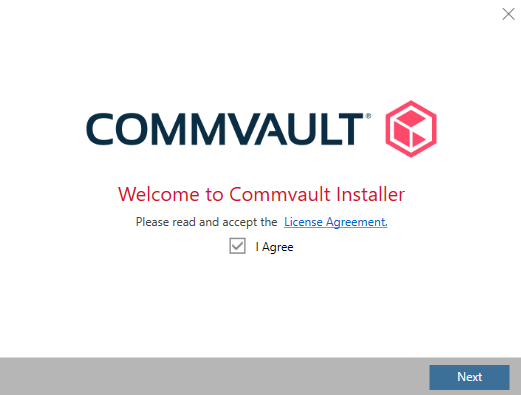
- Click the Agree box if you accept the License Agreement then click Next.
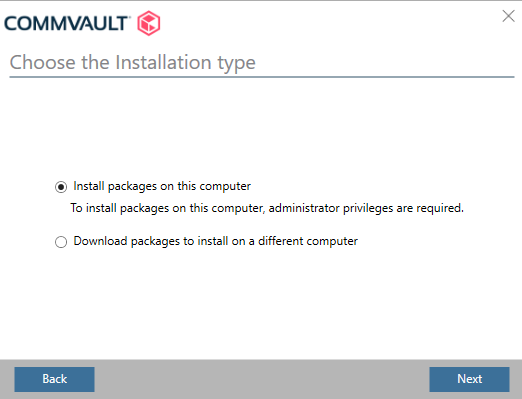
- Select Install packages on this computer then click Next.
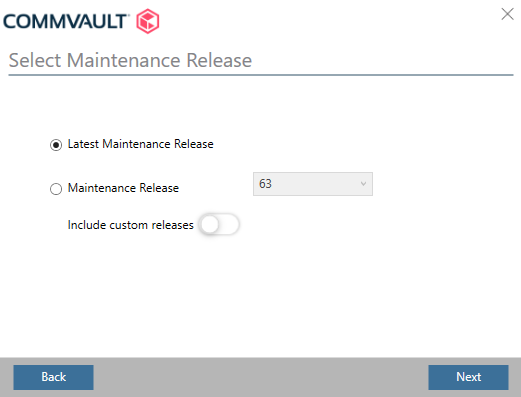
- Select the appropriate maintenance release then click Next.
- Choose the Install Option then click Next.
In my case, I am selecting Advanced selection. I want to make sure I am able to choose the software components I need.

- Click CommServe. The associated packages will also be selected automatically.
Click Next.

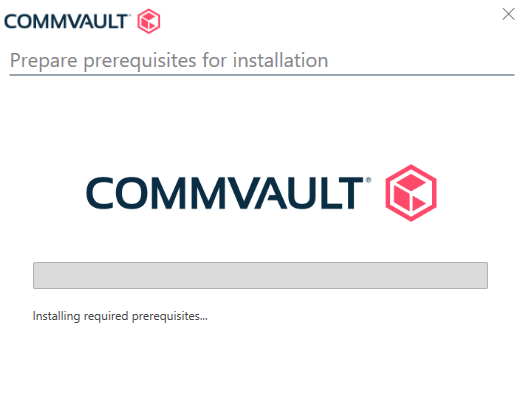
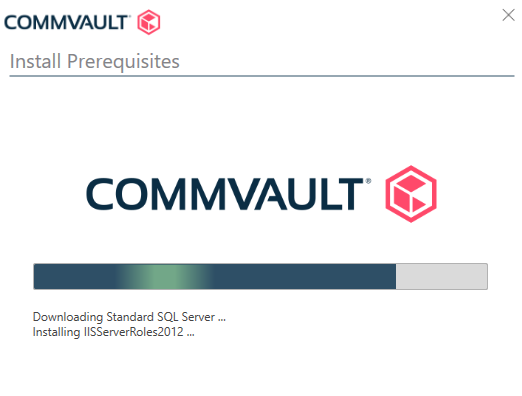
- The prerequisite installation dialogue box will briefly appear.
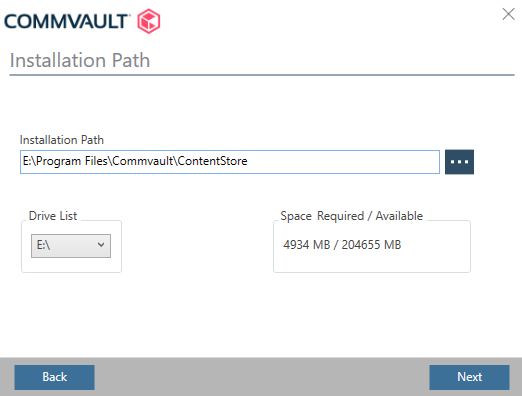
- Confirm the Installation path, then click Next.
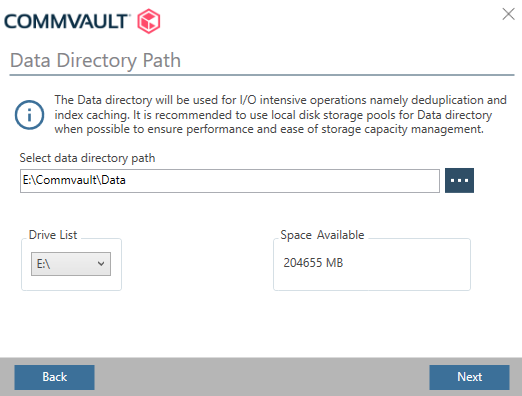
- Confirm the Data Directory Path, then click Next.
As this is only a test environment, I am selecting the same drive.
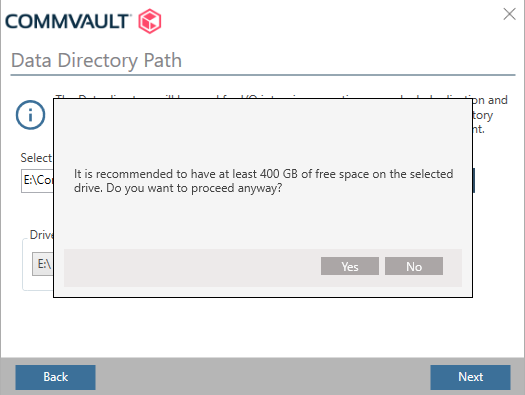
- Confirm the available space then click Yes.
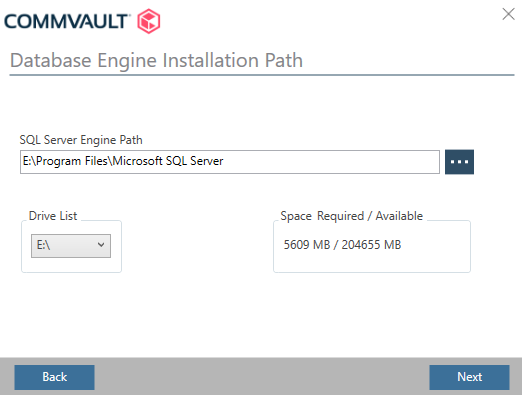
- Confirm the Database Engine Installation Path then click Next.
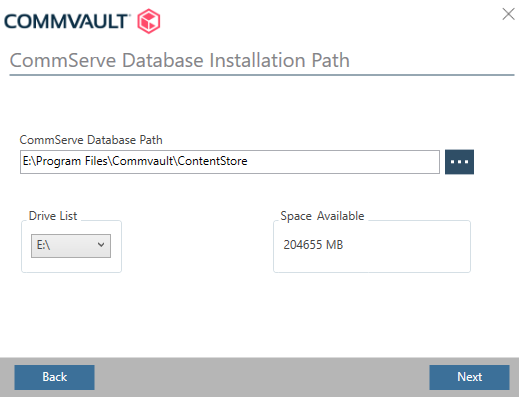
- Confirm the CommServe Database Installation Path then click Next.
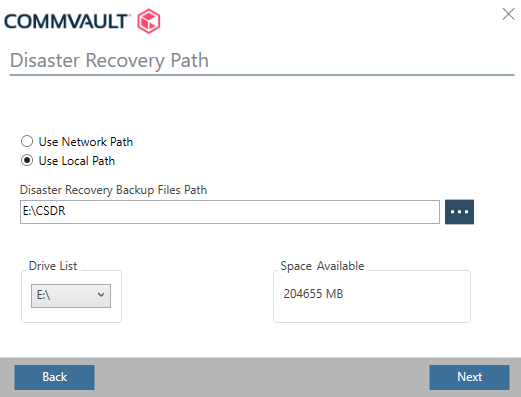
- Confirm the Disaster Recovery Path then click Next.
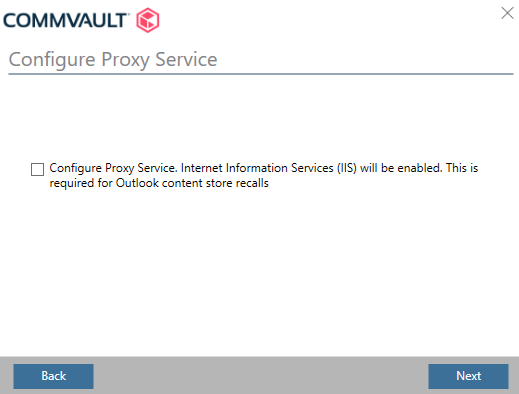
- Configure a Proxy Service if required.
This is not required in my test environment, so I am just going to click Next.
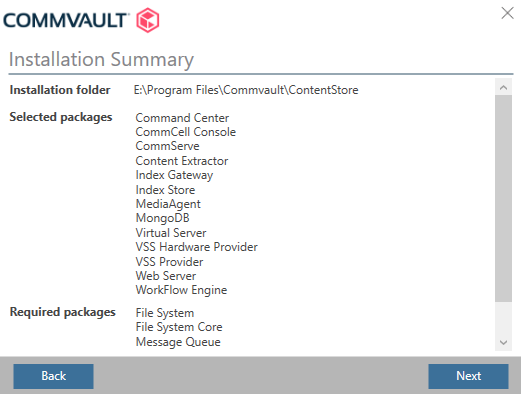
- Review and confirm the selected settings then click Next.
- The Installation and progress will be displayed.
This will take between 30min to 1hr to complete depending on the server hardware and the available internet download speed.
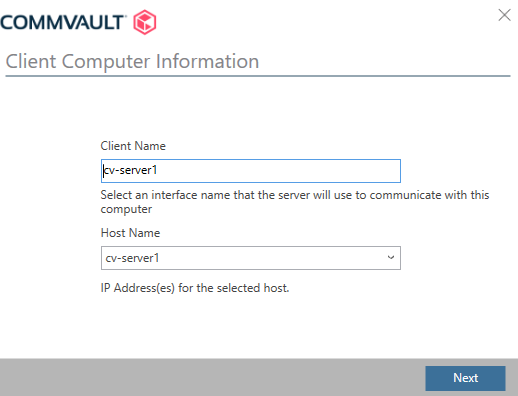
- After the packages have been installed, confirm the server information then click Next.
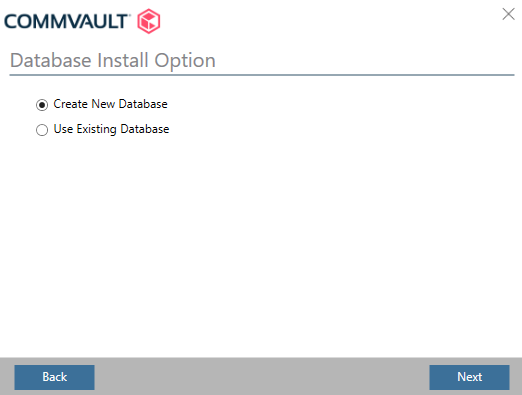
- Select Create New Database then click Next.
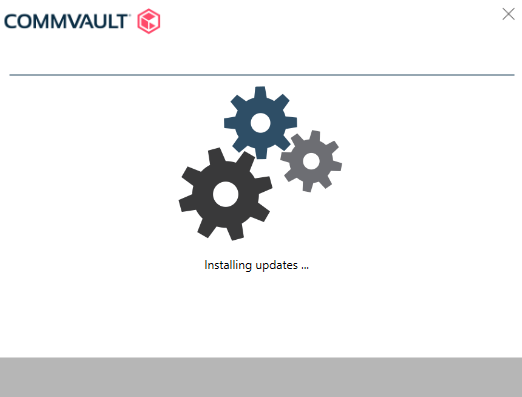
- The installation will continue.
This will take roughly another 30min.
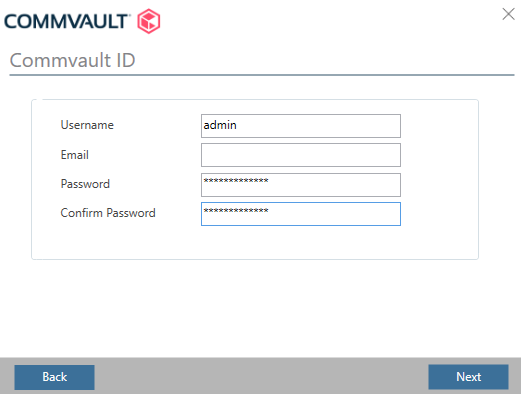
- Fill in the password fields then click Next.
- The Commvault Server software packages have been successfully installed.
Click Finish.
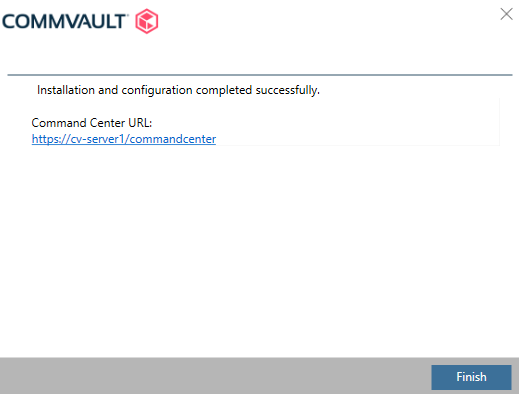
You can now logon and complete the Commvault Server configuration.
For more detailed information, please go to the Commvault Documentation link,
https://commvault.documentation.com